Hello my beautiful angels,
This is just a little update of what's going on in my life. Well I will be moving this week, so I won't have time to post looks and reviews. I know I haven't posted a review in a while and I have a lot of things I wanted to review. I was thinking when I get settled in my new apartment that I would start reviewing some things. And I've been doing a little bit of shopping here and there so I will probably make a post for that. I know I haven't posted anything but makeup looks and I apologize I've been wanting to do outfit's of the day but I just keep forgetting about that. If y'all have on suggestions on what other post you would like to see let me know, and I will be happy to do them. Also I've been thinking about changing the layout of my blog or at least the background I love the colors but I just think it's time for a change. Anyways, once I'm all settled in and unpacked I will start have posts available every 3 days and if you have any request of what you would like to see just let me know and I will be happy to do them.
Thank you for taking the time to read this and Happy Valentine's day!
-Tori

Monday, February 11, 2013

Thursday, February 7, 2013
Be Mine: A Valentine's Day Tutorial
I hope you guys enjoy this girly valentine's day look. I loved the way it came out, this is definitely the look I'll be rocking valentine's day. If you re-create this look tweet me a picture I would love to see your take on this. Well without further to do let's get started! :)

Products used on the eyes:
- Elf Eyelid Primer
- Profusion (Peach, Taupe, and Burgundy)
- L.A Colors eyeliner in Black
- The ColorWorkshop Mascara
- Hard Candy Perfecting Primer
- Elf Tinted Moisturizer
- Elf Pressed Face Powder
- Elf Bronzing Powder
- Color Workshop Palette (Pink Blush)
- Maybelline Loose Powder in Light (Highlight)
- Color Workshop Lip Liner in Pink
- Wet n Wild Just Peachy
- BH Cosmetics Lipgloss in Studious
- The Color Workshop Eyeshadow Brush
- Elf crease brush
- SOHO Blending Brush
- SOHO Liner Brush
- Elf Stippling/Blending Brush
- Color Workshop Contour brush
- Color workshop blush brush
- Apply your face primer before you start to apply your eye-shadow primer that way it would have sunken into your skin and your will be ready for you to apply your foundation.
- Apply an eyeshadow primer or if you don't have one apply a concealer and go over it with a bit of powder.
- Using an eyeshadow brush I applied a shimmer peach eyeshadow on the lid, don't go past the crease this is gonna help make it look like a cut-crease.
- Now apply a Taupe into the crease using a crease brush. Then apply a burgundy color in the outer corner blending in the Taupe color and blending it out above the crease. Make sure not to get these colors on the lid.
- Taking a small angled or liner brush I applied some of the burgundy eyeshadow under my lower lash line.
- Blend the colors for a seamless transition.
- Now apply a highlight under the brows. The one I used was a bit lighter than my skin tone. I also applied some in the inner corner and blended into the lid color.
- Now begin to line your eyes. This look is perfect with winged out liner, and since I pretty much suck at that, I took a dark brown eyeshadow and began to map out how I want my liner to look, and then I just traced over it with black eyeliner.
- For the waterline I applied a blue liner this step of course is completely up to you, you can use a different color or just opt for a black or white eyeliner instead.
- Apply mascara and falsies if you desire.
- Apply your face makeup.
- Taking a contour brush and elf bronzing powder begin to contour your face, place it at the hollows of your cheek, temples, both sides of your nose (optional) and along your jaw line. This of course if optional and it will make your face appear slimmer.
- Now using your blush brush begin to apply a pink blush to the apple of your cheeks.
- For the lips I lined them with a pink lip liner, then added a peach lipstick and went over it with a pink lipgloss to make it a bright almost barbie like pink.
Sunday, February 3, 2013
Neon Cotton Candy

Products used on the eyes:
- Urban Decay Eyeshadow Primer
- Milani Eyeshadow Pencil in Winter White
- BH Cosmetics 120 4th edition Palette (Blue with greenish flecks)
- L'Oreal High Intensity Pigment in Fiery
- BH Cosmetics liquid eyeliner pen in Black
- The ColorWorkshop Mascara
- Hard Candy Perfecting Primer
- Elf Tinted Moisturizer
- Elf Pressed Face Powder
- Color Workshop Palette (Bronzer)
- Elf Beauty on the go compact: Peach Blush
- Maybelline Loose Powder in Light (Highlight)
- Color Workshop Lip Liner in Pink
- Wet n Wild Just Peachy
- Elf Super Glossy Lipgloss in Sugar Cookie
- Elf Eyeshadow Brush
- Elf "C" Brush
- Elf crease brush
- SOHO Blending Brush
- Elf Stippling/Blending Brush
- Color Workshop Contour brush
- Color workshop blush brush
- Apply your face primer before you start to apply your eye-shadow primer that way it would have sunken into your skin and your will be ready for you to apply your foundation.
- Apply an eyeshadow primer or if you don't have one apply a concealer and go over it with a bit of powder.
- I applied a white base all over my lid.
- Using an eyeshadow brush I applied a shimmer blue eyeshadow with green flecks, almost kinda like a blue green, on the lid.
- Now apply a dark hot pink into the crease and above the crease. I also used this same color and applied it into my lower lash line.
- Now apply a highlight under the brows. The one I used was a bit lighter than my skin tone. I also applied some in the inner corner and blended into the lid color.
- Now begin to line your eyes with a black eyeliner, and then add some mascara.
- Apply your face makeup.
- Taking a contour brush and elf bronzing powder begin to contour your face, place it at the hollows of your cheek, temples, both sides of your nose (optional) and along your jaw line. This of course if optional and it will make your face appear slimmer.
- Now using your blush brush begin to apply a peach blush to the apple of your cheeks.
- For the lips I lined them with a pink lip liner, then added a peach lipstick and went over it with a pink lipgloss to make it a bright almost barbie like pink.
Friday, February 1, 2013
Valentine's Day: Intense Eye w/ 3 lip combos
Hello my beautiful angels, I'm back with an intense Valentine's Day look with three different lip combos. I hope yall enjoy and I will post a neutral look next week.

Products used on the eyes:
- Urban Decay Primer Potion
- JLB Eyeliner in Black
- Sephora Block Buster Palette (Black, Silver, Highlight,and Black Gel Liner)
- The Color Workshop Mascara
- Hard Candy Sheer Envy Skin Perfecting Primer
- Rimmel London Poreless Foundation
- Cover Girl Translucent Powder
- Color Workshop Palette (Bronzer)
- Sephora Block Buster Palette Peachy Blush
- Maybelline Loose Powder in Light (Highlight)
- Wet n Wild Bare It All Lipstick
- NYC Liquid Lipshine Lip Gloss in Nude City
- Color Workshop Lip Liner in Pink
- Wet n Wild Just Peachy Lipstick
- BH Cosmetics Lip Gloss in Studious
- Elf Lip Gloss in Sugar Cookie
- Color Workshop Lip Liner in Red
- Color Workshop Lipstick in Red
- Elf Eyeshadow Brush
- Elf crease brush
- Color Workshop Angled Blending Brush
- Color workshop Stippling/Blending Brush
- Elf Contour brush
- Color workshop blush brush
- Apply your face primer before you start to apply your eye-shadow primer that way it would have sunken into your skin and your will be ready for you to apply your foundation.
- Apply an eyeshadow primer or if you don't have one apply a concealer and go over it with a bit of powder.
- Now line along your lashes make sure the line near the inner corner is thin going thicker into the outer corner and add some liner into the crease, the line doesn't need to be neat. Now blend out the middle should be have little to no liner at all if it does it's fine.
- Using an eyeshadow brush I applied a black eyeshadow from the middle of the lid going to the outer corner and into the crease.
- Apply asilver eyeshadow on the inner part of the lid and blend into the black for a seamless transition.
- Add some black eyeshadow into your lower lashine going about half way.
- Now apply a matte highlight under the brows and a shimmer highlight in the inner corner of the eye and tadd some in the inner corner of your lower lashes blending into the black.
- Now begin to line your eyes with a black eyeliner and add mascara and falsies if you want extra drama.
- Add concealer to spots where you need to conceal imperfections and to dark circles.
- Using a stippling brush apply your foundation to your face.Blend it in and remember to put some on your neck.
- Next apply a powder to set in your foundation. For this I used the stippling brush.
- Taking a contour brush and elf bronzing powder begin to contour your face, place it at the hollows of your cheek, temples, both sides of your nose (optional) and along your jaw line. This of course if optional and it will make your face appear slimmer.
- Now using your blush brush begin to apply a blush to the apple of your cheeks.
- For this look nude, pink or red lips look awesome with it. :)
Monday, January 28, 2013
This Girl Is On Fire

Products used on eyes:
- Urban Decay Primer Potion
- NYX Eyeliner in Milk
- BH Cosmetics 120 Pallet (yellow, orange & red)
- NYX Single Eyeshadow in Mellow Yellow
- 8 Bit Cosmetics Phoenix
- 8 Bit Cosmetics Bad Ass Ginger
- 8 Bit Cosmetics Protégé
- Wet n Wild Eyeliner Pencil in Black
- BH Cosmetics Liquid Eyeliner Pen
- Color Workshop Mascara
Products used for the face:
- Elf Tinted Moisturizer
- True blend Mineral Powder
- Color Workshop Peachy blush & Contour
Brushes Used:
- Elf Eye-shadow brush
- Elf "C" Eye-shadow Brush
- Elf Crease Brush
- Color Workshop Liner Brush
- Mini Kabuki Brush
- Elf Contour brush
- Color workshop blush brush
Get the look:
- Apply an eye-shadow primer or if you don't have one apply a concealer and go over it with a bit of powder, in this case I've used the concealer and powder.
- Apply a white base and blend over lid.
- Taking an eyeshadow brush begin to apply a shimmer silver from the inner corner to about half way in the lid.
- Using the other side of the brush apply a shimmer yellow 1/3 onto the lid, apply an orange next to the yellow and on the rest of the lid apply a red., make sure to blend.
- Now using a different brush apply a matte yellow, orange and red over the colors already on the lid, don't forget to blend.
- Now line your eyes, add mascara, and add a highlight.
- Apply your face makeup.
- Taking a contour brush and blush darker than your skin tone begin to contour your face, place it at the hollows of your cheek, temples, both sides of your nose (optional) and along your jaw line. This of course if optional and it will make your face appear slimmer.
- Now using your blush brush begin to apply blush to the apple of your cheeks.
- Now add a lip color of your choice.
Monday, January 21, 2013
Day to Night Look
Hey hello beauties, so for Christmas I got the ELf Beauty On The Go Compact for Christmas. It has a neutral side and a colorful side and I thought it would be perfect for doing a day to night look.
 Products used on the eyes:

- Elf Eyelid primer
- Love My Eyes White Eyeliner
- Elf's Beauty On The Go Compact: Gold and a Purplish Brown, Green, Blue and Navy
- JLB Black Eyeliner Pencil
- Elf liquid eyeliner pen in Black
- The ColorWorkshop Mascara
- Elf Tinted Moisturizer
- Cover Girl Translucent Powder
- Elf's Beauty On The Go Compact: Bronzer and Peachy Blush
- Klean Color Blush Palette: Mauve
- Maybelline Loose Powder in Light (Highlight)
- Wet N Wild Just Peachy Lipstick
- Elf Lipgloss in Sugar Cookie
- NYC Liquid lipshine in Clear City
- Elf Lipgloss in Sugar Plum Fairy
- Elf
- Color Workshop Eyeshadow Brush
- Elf crease brush
- Color Workshop Angled Shadow Brush
- SOHO Blending Brush
- Elf Stippling/Blending Brush
- Color Workshop Contour brush
- Color workshop blush brush
Day Look:
- Apply your face primer before you start to apply your eye-shadow primer that way it would have sunken into your skin and your will be ready for you to apply your foundation.
- Apply an eyeshadow primer or if you don't have one apply a concealer and go over it with a bit of powder.
- I applied a white base all over my lid.
- Using an eyeshadow brush I applied a gold eyeshadow, on the lid.
- Now apply a purplishbrown color into the crease creating a cut crease look. I also used this same color and applied it into my lower lash line.
- Now apply a highlight under the brows. The one I used was a bit lighter than my skin tone. I also applied some in the inner corner..
- Now begin to line your eyes with a black eyeliner, for the top lid I just tight lined, and then add some mascara.
- Now apply your face makeup.
- Taking a contour brush and elf bronzing powder begin to contour your face, place it at the hollows of your cheek, temples, both sides of your nose (optional) and along your jaw line. This of course if optional and it will make your face appear slimmer.
- Now using your blush brush begin to apply a peachy blush to the apple of your cheeks.
- For the lips I just applied a peachy lipstick and went over it with a pink shimmer lipgloss.
Night Look:
- Apply a light green eyeshadow over the gold, I love how the gold turned it into a yellow-green.
- In the crease apply a blue eyeshadow,and then apply a navy blue in the outer corner to create a wing and blend into the blue.
- I applied eyeliner on my top lid and winged it out. I applied more black eyeliner on my waterline, you can add falsies to make the look even more rockin'.
- Just refresh your face powder if you need too.
- I applied a mauve blush on my cheek, and a highlighter.
- For the lips I just applied a clear lip gloss from NYC and went over it with another clear lip gloss that has shimmer in it.
Sunday, January 13, 2013
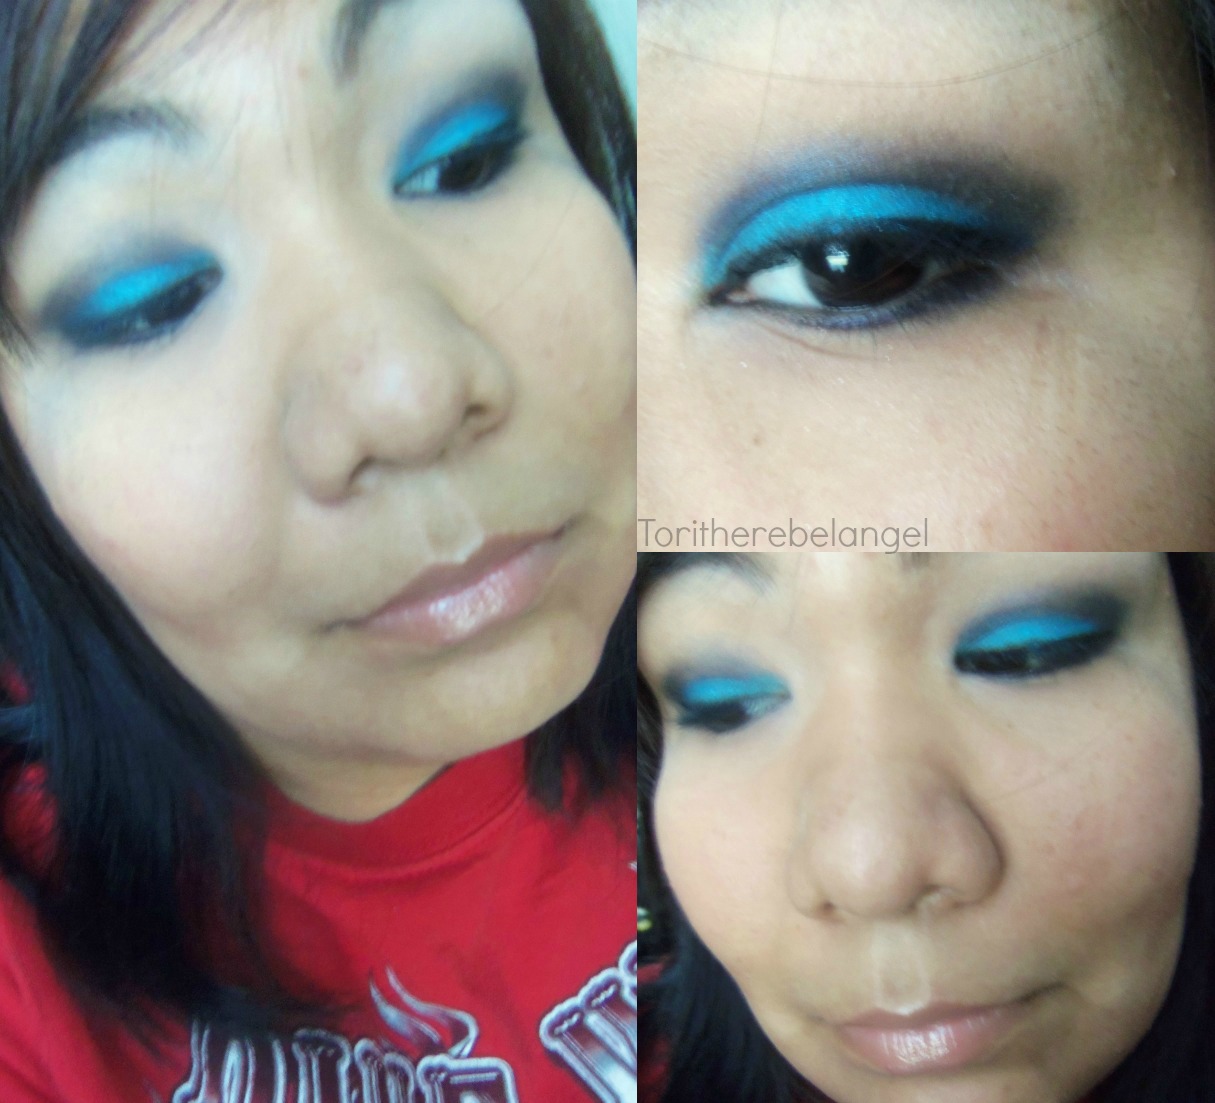
Sub-Zero: A Make-up look
Hey guys I'm back with an insanely awesome look, that is totally something I didn't think I can pull off, but it looks super awesome on me. I didn't know what to call it and someone suggest I name it Sub-Zero so I did since I am a fan of Mortal Kombat and Sub-Zero himself. Anyways, if you wanna know how to do this look, let's get started! :)
 Products used on the eyes:
- Elf Eyelid primer
- Milani Eyeshadow Pencil in Aquatic Style
- Sephora Block Buster Palette (Sky Blue,Navy Blue and Beige)
- Elf liquid eyeliner pen in Black
- The ColorWorkshop Mascara
- Cover Girl Translucent Powder
- Color Workshop Palette (Bronzer)
- Sephora Block Buster Pallete (Rosey Pink Blush
- Maybelline Loose Powder in Light (Highlight)
- NYC Liquid lipshine in Clear City
- Color Workshop Eyeshadow Brush
- Elf crease brush
- SOHO Blending Brush
- Elf Stippling/Blending Brush
- Color Workshop Contour brush
- Color workshop blush brush
- Apply your face primer before you start to apply your eye-shadow primer that way it would have sunken into your skin and your will be ready for you to apply your foundation.
- Apply an eyeshadow primer or if you don't have one apply a concealer and go over it with a bit of powder.
- I applied a blue base all over my lid. If you don't have a blue base you can opt for a white base instead.
- Using an eyeshadow brush I applied an almost sky blue glitter eyeshadow, it's a tad bit darker than an actual sky blue,on the lid.
- Now apply a navy blue color into the crease creating a cut crease look. I also used this same color and applied it into my lower lash line.
- Now apply a highlight under the brows. The one I used was a bit lighter than my skin tone. I also applied some in the inner corner and blended into the navy blue.
- Now begin to line your eyes with a black eyeliner, and then add some mascara.
- I didn't apply foundation only powder.
- Taking a contour brush and elf bronzing powder begin to contour your face, place it at the hollows of your cheek, temples, both sides of your nose (optional) and along your jaw line. This of course if optional and it will make your face appear slimmer.
- Now using your blush brush begin to apply a blush to the apple of your cheeks.
- For the lips I just applied a clear lip gloss.
Friday, January 11, 2013
Thank you! + New Year's Goals
So guys I'm sooo happy to announce that I finally reached a 100 subscribers on my youtube! Ahhh it's so exciting! I also wanted to take this time and take you guys for following my blog, you don't know how much this means to me! When I started making videos and blogging I honestly didn't think I would get this far. So once again THANK YOU! Also I just wanted to let y'all know that I am hosting a giveaway on my youtube channel in honor of reaching a 100 subbies (www.youtube.com/user/Toritherebelangel), if you would like to be part of this giveaway all you have to do is subscribe!
Moving on, I wanted to share my goals for this year, for both my online and personal life. I want my blog and channel to grow even more. I also will be including hair tutorial, more reviews, Outfits of the day, posts about whats going on in my life and DIY projects. I want to expand and reach out more to a broader audience and I will still be doing makeup looks. I have so many looks planned and I can't wait to show y'all. As for my personal life I want to get back on track and start getting fit. I was exercising daily but just stopped when my life got busy and I love the way I look but I just want to improve my body a bit and be able not to feel all blah. I also want to step out of my comfort zone, since it's what stops me from doing things at times. Well this is all I can think of that I set out to accomplish this year. I would love to hear what you guys want to happen this year, just comment down below! :D
Remember guys no matter what you set out to do in life never let anyone stop you. If something doesn't go your way don't get discourage and always remember sometimes you have to make things happen for yourself, don't just sit around and wait for it to happen! :)
Moving on, I wanted to share my goals for this year, for both my online and personal life. I want my blog and channel to grow even more. I also will be including hair tutorial, more reviews, Outfits of the day, posts about whats going on in my life and DIY projects. I want to expand and reach out more to a broader audience and I will still be doing makeup looks. I have so many looks planned and I can't wait to show y'all. As for my personal life I want to get back on track and start getting fit. I was exercising daily but just stopped when my life got busy and I love the way I look but I just want to improve my body a bit and be able not to feel all blah. I also want to step out of my comfort zone, since it's what stops me from doing things at times. Well this is all I can think of that I set out to accomplish this year. I would love to hear what you guys want to happen this year, just comment down below! :D
Remember guys no matter what you set out to do in life never let anyone stop you. If something doesn't go your way don't get discourage and always remember sometimes you have to make things happen for yourself, don't just sit around and wait for it to happen! :)
Monday, January 7, 2013
New Year's Eve Makeup + OOTD
My makeup that I wore for New Year's. I hope everyone had a wonderful Christmas and New Year's.

Products used on the eyes:
- Urban Decay Primer Potion
- NYX Jumbo Pencil in Milk
- 8 Bit Cosmetics Matte Gold/Bronze "Armature"
- 8 Bit Cosmetics Matte Black "Knight in shining Kelvar"
- 8 Bit Cosmetics Matte Purple"The Cat"
- Sephora Eyeliner Pencil in Black
- Wet N' Wild Water Proof liquid eyeliner in Black
- The ColorWorkshop Mascara
- Hard Candy Sheer Envy Skin Perfecting Primer
- Rimmel London Poreless Foundation
- Cover Girl Translucent Powder
- Color Workshop Palette (Bronzer & Pink Blush)
- Maybelline Loose Powder in Light (Highlight)
- Color Workshop Lip Liner in Red
- L.A Colors Lipstick in Berry Ice
- Elf Eyeshadow Brush
- Elf crease brush
- SOHO Blending Brush
- Elf Stippling/Blending Brush
- Elf Contour brush
- Color workshop blush brush
- Apply your face primer before you start to apply your eye-shadow primer that way it would have sunken into your skin and your will be ready for you to apply your foundation.
- Apply an eyeshadow primer or if you don't have one apply a concealer and go over it with a bit of powder.
- I applied a white base all over my lid.
- Using an eyeshadow brush I applied a gold/bronze eyeshadow on the lid.
- Now apply a black color into the crease creating a cut crease look. I blended a purple color above the crease into the black.
- Now apply a highlight under the brows.
- Now begin to line your eyes with a black eyeliner, and then add some mascara.
- Using a stippling brush apply your foundation to your face.Blend it in and remember to put some on your neck.
- Next apply a powder to set in your foundation. For this I used the stippling brush.
- Taking a contour brush and elf bronzing powder begin to contour your face, place it at the hollows of your cheek, temples, both sides of your nose (optional) and along your jaw line. This of course if optional and it will make your face appear slimmer.
- Now using your blush brush begin to apply a blush to the apple of your cheeks.
- I lined my lips with a red lip liner and went over it with a dark red lipstick.
Outfit:
My outfit consisted of a loose fitting shirt that was fitted at the bottom with a sparkly black jacket, jeans and black wedges.

Friday, December 21, 2012
A Silver and Pink Makeup look
I've received a really pretty pink with a red tone eyeshadow from 8 Bit Cosmetics and I've been wanting to use it for a while and couldn't think of any look to use it but I finally came up with this and I hope y'all like it. :)

Products used on the eyes:
- Elf Eyelid Primer
- Milani Easy Liner For Eyes Glitter in Precious Silver
- BH Cosmetics 88 Matte Palette (Silver)
- BH Cosmetics 120 4th Edition Palette (Silver)
- 8 Bit Cosmetics Pryde
- JLB Eyeliner Pencil in Black
- L.A Colors liquid eyeliner in Black
- The Color Workshop Mascara
- Hard Candy Sheer Envy Skin Perfecting Primer
- Rimmel London Poreless Foundation
- Cover Girl Translucent Powder
- Color Workshop Palette (Bronzer)
- Klean Color Blush Palette (Mauve)
- Maybelline Loose Powder in Light (Highlight)
- L.A Colors Lipstick in Hint
- Elf Eyeshadow Brush
- Elf crease brush
- SoHo Crease Brush
- Color workshop Stippling/Blending Brush
- Elf Contour brush
- Color workshop blush brush
- Apply your face primer before you start to apply your eye-shadow primer that way it would have sunken into your skin and your will be ready for you to apply your foundation.
- Apply an eyeshadow primer or if you don't have one apply a concealer and go over it with a bit of powder.
- I applied a silver base all over my lid.
- Using an eyeshadow brush I applied a silver eyeshadow on the lid and applied a shimmer silver eyeshadow over it.
- Now apply a pink with a red tone color into the crease, don't forget to blend! :)
- Now apply a highlight under the brows.
- Now begin to line your eyes with a black eyeliner, I applied a white eyeliner onto my waterline and then add some mascara.
- I applied the same silver base into my lower lash line for more shimmer.
- Using a stippling brush apply your foundation to your face.Blend it in and remember to put some on your neck.
- Next apply a powder to set in your foundation. For this I used the stippling brush.
- Taking a contour brush and elf bronzing powder begin to contour your face, place it at the hollows of your cheek, temples, both sides of your nose (optional) and along your jaw line. This of course if optional and it will make your face appear slimmer.
- Now using your blush brush begin to apply a blush to the apple of your cheeks.
- I applied a dark pink lipstick with shimmer in it.
Wednesday, December 19, 2012
Sexy Holiday Makeup

Products used on the eyes:
- Urban Decay Primer Potion
- NYX Jumbo Pencil in Milk
- Milani Powder Eyeshadow in White Lie
- 8Bit Cosmetics Matte Black "Knight in shining Kelvar"
- The Color Workshop Palette (Flower & Blush)
- Sephora Eyeliner Pencil in Black
- Wet N' Wild Water Proof liquid eyeliner in Black
- Elf Natural Lashes
- Rimmel London Sexy Curves Mascara
- Hard Candy Sheer Envy Skin Perfecting Primer
- Rimmel London Poreless Foundation
- Cover Girl Translucent Powder
- Color Workshop Palette (Bronzer)
- Klean Color Blush Palette (Mauve)
- Maybelline Loose Powder in Light (Highlight)
- Color Workshop Lip Liner in Red
- Color Workshop Lipstick in Red
- Elf Eyeshadow Brush
- Elf crease brush
- Color Workshop Angled Blending Brush
- Color workshop Stippling/Blending Brush
- Elf Contour brush
- Color workshop blush brush
- Apply your face primer before you start to apply your eye-shadow primer that way it would have sunken into your skin and your will be ready for you to apply your foundation.
- Apply an eyeshadow primer or if you don't have one apply a concealer and go over it with a bit of powder.
- I applied a white base all over my lid.
- Using an eyeshadow brush I applied a white eyeshadow on the lid.
- Now apply a black color into the crease creating a cut crease look. I blended a magenta color above the crease into the black.
- Now apply a highlight under the brows.
- Now begin to line your eyes with a black eyeliner, I applied a white eyeliner onto my waterline and then add some mascara.
- Using a stippling brush apply your foundation to your face.Blend it in and remember to put some on your neck.
- Next apply a powder to set in your foundation. For this I used the stippling brush.
- Taking a contour brush and elf bronzing powder begin to contour your face, place it at the hollows of your cheek, temples, both sides of your nose (optional) and along your jaw line. This of course if optional and it will make your face appear slimmer.
- Now using your blush brush begin to apply a blush to the apple of your cheeks.
- I lined my lips with a red lip liner and went over it with a bright red lipstick.
Monday, December 17, 2012
Milani Eyeliners
I've received two Milani eyeliners along with an eyeshadow palette that I've reviewed in the past. These two are both silver and I bought two of their shadow eyez pencils.
Milani Liqui'f Metallic Eyeliner:
 This eyeliner is absolutely gorgeous. It's silver with a bit of shimmer in it but not too much to wear it's a bother. I will admit I was a bit hesitant about it since the BH Cosmetics eyeliner in silver was horrible. This product is the complete opposite, it is AMAZING! It glides on smoothly. Once you allow it to set for a few seconds it is budge proof, and living in Texas the heat is unbearable and it didn't transfer or budge at all.It's very bold and lovely. I absolutely love this pencil and will definitely pick up more of these pencils in the future. If you need a budge proof eyeliner I highly recommend this one, they come in other colors. This gets a 10/10
Swatch:

Milani Retractable Easy Liner For Eyes Shimmer:


This eyeliner is a bit different from the liqui'fied one as it is retractable and has a smudger at the end of the pencil. The color I received was silver as well. It is very similar to the liqui'fied one as it is budge proof once it sets, glides on smoothly, and bold. However, it is very shimmery but perfect to use as a highlight for the inner corner. This also comes in other colors. This eyeliner gets a 10/10.
Swatch:

Milani Shadow Eyez Pencil:


I picked these two up. I got Aquatic Style and Winter White. These pencils can be used as an eyeshadow, base, and eyeliner. They have a metallic finish and last for 12 hours. These pencils are creamy, however, they don't blend that well and aren't that great as a base. If you use it as a base it makes your eyeshadow look weird. The colors are very pigments, which I love, and they are budge proof and when they say they last for 12 hours they really do! They are about the size of the NYX Jumbo Eye Pencils. I give these an 7/10.
Swatches:

Milani Liqui'f Metallic Eyeliner:

Swatch:

Milani Retractable Easy Liner For Eyes Shimmer:


This eyeliner is a bit different from the liqui'fied one as it is retractable and has a smudger at the end of the pencil. The color I received was silver as well. It is very similar to the liqui'fied one as it is budge proof once it sets, glides on smoothly, and bold. However, it is very shimmery but perfect to use as a highlight for the inner corner. This also comes in other colors. This eyeliner gets a 10/10.
Swatch:

Milani Shadow Eyez Pencil:


I picked these two up. I got Aquatic Style and Winter White. These pencils can be used as an eyeshadow, base, and eyeliner. They have a metallic finish and last for 12 hours. These pencils are creamy, however, they don't blend that well and aren't that great as a base. If you use it as a base it makes your eyeshadow look weird. The colors are very pigments, which I love, and they are budge proof and when they say they last for 12 hours they really do! They are about the size of the NYX Jumbo Eye Pencils. I give these an 7/10.
Swatches:

Wednesday, December 12, 2012
HolidayTutorial
This look is part of a Holiday Collab on youtube with my friend.

Products used on the eyes:
- NYX Eyeshadow Base in Skintone
- Love My Eyes White Eyeliner
- BH Cosmetics 120 4th edition Palette (Red)
- BH Cosmetics 88 Matte Palette (White, Red and Black)
- JLB Eyeliner Pencil in Black
- Santee Mascara
- Hard Candy Sheer Envy Skin Perfecting Primer
- Rimmel London Poreless Foundation
- Cover Girl Translucent Powder
- Klean Color Palette (Bronzer & Peach Blush)
- Wet n' Wild lipstick in Bare It all
- NYC Liquid Lip Shine in Nude York City
- Color Workshop Eyeshadow Brush
- Elf crease brush
- Color workshop Stippling/Blending Brush
- Elf Contour brush
- Color workshop blush brush
- Apply your face primer before you start to apply your eye-shadow primer that way it would have sunken into your skin and your will be ready for you to apply your foundation.
- Apply an eyeshadow primer or if you don't have one apply a concealer and go over it with a bit of powder.
- I applied a white base all over my lid.
- Using an eyeshadow brush I applied a white eyeshadow from the inner corner to 1/3 on the lid.
- Apply a red onto the rest of the lid, don't forget to blend these two together.
- Now apply a black color into the crease creating a cut crease look. I blended some red above the crease into the black.
- Apply a shimmer red all over the red for a bit of shimmer.
- Now apply a highlight under the brows.
- Now begin to line your eyes with a black eyeliner, I applied a white eyeliner onto my waterline and then add some mascara.
- Using a stippling brush apply your foundation to your face.Blend it in and remember to put some on your neck.
- Next apply a powder to set in your foundation. For this I used the stippling brush.
- Taking a contour brush and elf bronzing powder begin to contour your face, place it at the hollows of your cheek, temples, both sides of your nose (optional) and along your jaw line. This of course if optional and it will make your face appear slimmer.
- Now using your blush brush begin to apply a blush to the apple of your cheeks.
- I applied a nude lipstick and went over it with a nude lip gloss.
Monday, December 10, 2012
Purple Smoke: A Holiday Tutorial
This look is a purple smokey eye with a nude lip.

Products used on the eyes:

Products used on the eyes:
- NYX Eyeshadow Base in Skintone
- NYX Jumbo Eye Pencil in Milk
- BH Cosmetics 120 4th edition Palette (Purple)
- BH Cosmetics 88 Matte Palette (Light Purple,Medium Purple and Black)
- JLB Eyeliner Pencil in Black
- Color Workshop Mascara
- Hard Candy Sheer Envy Skin Perfecting Primer
- Rimmel London Poreless Foundation
- Cover Girl Translucent Powder
- Color Workshop Blush Palette (Bronzer & Peach Blush)
- Wet n' Wild lipstick in Bare It all
- NYC Liquid Lip Shine in Nude York City
- Color Workshop Eyeshadow Brush
- Elf crease brush
- Color workshop Stippling/Blending Brush
- Elf Contour brush
- Color workshop blush brush
- Apply your face primer before you start to apply your eye-shadow primer that way it would have sunken into your skin and your will be ready for you to apply your foundation.
- Apply an eyeshadow primer or if you don't have one apply a concealer and go over it with a bit of powder.
- I applied a white base all over my lid.
- Apply a shimmer purple all over your lid, this is optional.
- Using an eyeshadow brush I applied a light purple eyeshadow from the inner corner to the middle of the lid.
- Apply a medium dark purple onto the rest of the lid, don't forget to blend these two together.
- Now apply a dark purple color into the above the crease blending into the the other colors..
- I applied a bit of a matte black eyeshadow into the outer corner for a bit of dimension.
- Now apply a highlight under the brows.
- Now begin to line your eyes with a black eyeliner and then add some mascara.
- Using a stippling brush apply your foundation to your face.Blend it in and remember to put some on your neck.
- Next apply a powder to set in your foundation. For this I used the stippling brush.
- Taking a contour brush and elf bronzing powder begin to contour your face, place it at the hollows of your cheek, temples, both sides of your nose (optional) and along your jaw line. This of course if optional and it will make your face appear slimmer.
- Now using your blush brush begin to apply a blush to the apple of your cheeks.
- I applied a nude lipstick and went over it with a nude lip gloss.
Wednesday, December 5, 2012
Holiday Glam
This is one of the many holiday looks I will be doing for this month! I hope you enjoy and as always if you have any request I will be happy to do it. Lets get started. :)

Products used on the eyes:
- Mac Eye Primer
- NYX Jumbo Eye Pencil in Milk
- Milani Powder Eyeshadow in White Lie
- BH Cosmetics 88 Matte Palette Light Shimmer Brown
- Color Workshop Palette Brown,Black Out, and Buff
- Sephora Eyeliner Pencil in Black
- BH Cosmetics Liquid Eyeliner Pen in Black
- Color Workshop Mascara
- Elf Natural False Lashes
- Hard Candy Sheer Envy Skin Perfecting Primer
- Rimmel London Poreless Foundation
- Cover Girl Translucent Powder
- Klean Color Blush Palette (Bronzer & Mauve Blush)
- Color Workshop Lipstick Vampy Red
- L.A. Colors Lipstick in Berry Ice
Brushes Used:
- Color Workshop Eyeshadow Brush
- Elf crease brush
- Color workshop Stippling/Blending Brush
- Elf Contour brush
- Color workshop blush brush
- Apply your face primer before you start to apply your eye-shadow primer that way it would have sunken into your skin and your will be ready for you to apply your foundation.
- Apply an eyeshadow primer or if you don't have one apply a concealer and go over it with a bit of powder.
- I applied a white base all over my lid.
- Using an eyeshadow brush I applied a white eyeshadow from the inner corner to 2/3 on the lid.
- Now apply a light shimmer brown in the outer corner.
- Now apply a brown color into the above the crease blending into the shimmer brown.
- I applied a matte black eyeshadow into the crease for a cut crease look as well as to add a bit of dimension.
- Now apply a highlight under the brows.
- Now begin to line your eyes with a black eyeliner and then add some mascara. I added false lashes.
- Using a stippling brush apply your foundation to your face.Blend it in and remember to put some on your neck.
- Next apply a powder to set in your foundation. For this I used the stippling brush.
- Taking a contour brush and elf bronzing powder begin to contour your face, place it at the hollows of your cheek, temples, both sides of your nose (optional) and along your jaw line. This of course if optional and it will make your face appear slimmer.
- Now using your blush brush begin to apply a blush to the apple of your cheeks.
- I applied two lipsticks. One from the Color Workshop and it was a shimmer vampy red and I add a bit of L.A Color's Ice Berry to the center.
Friday, November 30, 2012
Milani & NYX Eyeshadow Review
I've picked up a few eyeshadows in the past weeks. One is from NYX and the others are from Milani. I've never tried any of their eyeshadows so I was very excited as I've heard great things about them. Let's get started with this review!
Milani Powder Eyeshadows:

I got two of these eyshadows one is White Lie and the other is Olympian Blue. The packing is really cute it's round and is a bit similar to how Mac's eyeshadows are but bigger.First off by looking at these eyeshadows they look very pigmented! When I went to swatch them with my finger they were very pigmented and bright! They look amazing without a base but with a base the colors are super bold. They are easy to blend and a little goes a long way. I give these eyeshadows a perfect 10. The price for them are $5.99.
Swatches: Left: over Base Right: No Base

Milani Runway Eyes Fashion Shadows:

I receieved these eye shadows for winning a giveaway they were hosting on twitter. The one I got was Backstage Basics. This little mini palette comes with 6 eyeshadows ranging from white to black. I did not like the packaging it was a bit difficult to open and I broke my nail trying to open it. These eyeshadows have shimmer in them and look a bit chalky. However, with these you have to build up to the intensity that you want. The colors last all day with out fading, it looked like I just applied my eye makeup! They are easy to blend. I think this little palette is ideal for traveling or when you're on the go. I would definitely recommend using a base underneath as the colors will show a lot better. The price for this is $8.99.I give this little palette an 8.
Swatches: Left: over Base Right: No Base

NYX Single Eyeshadow:

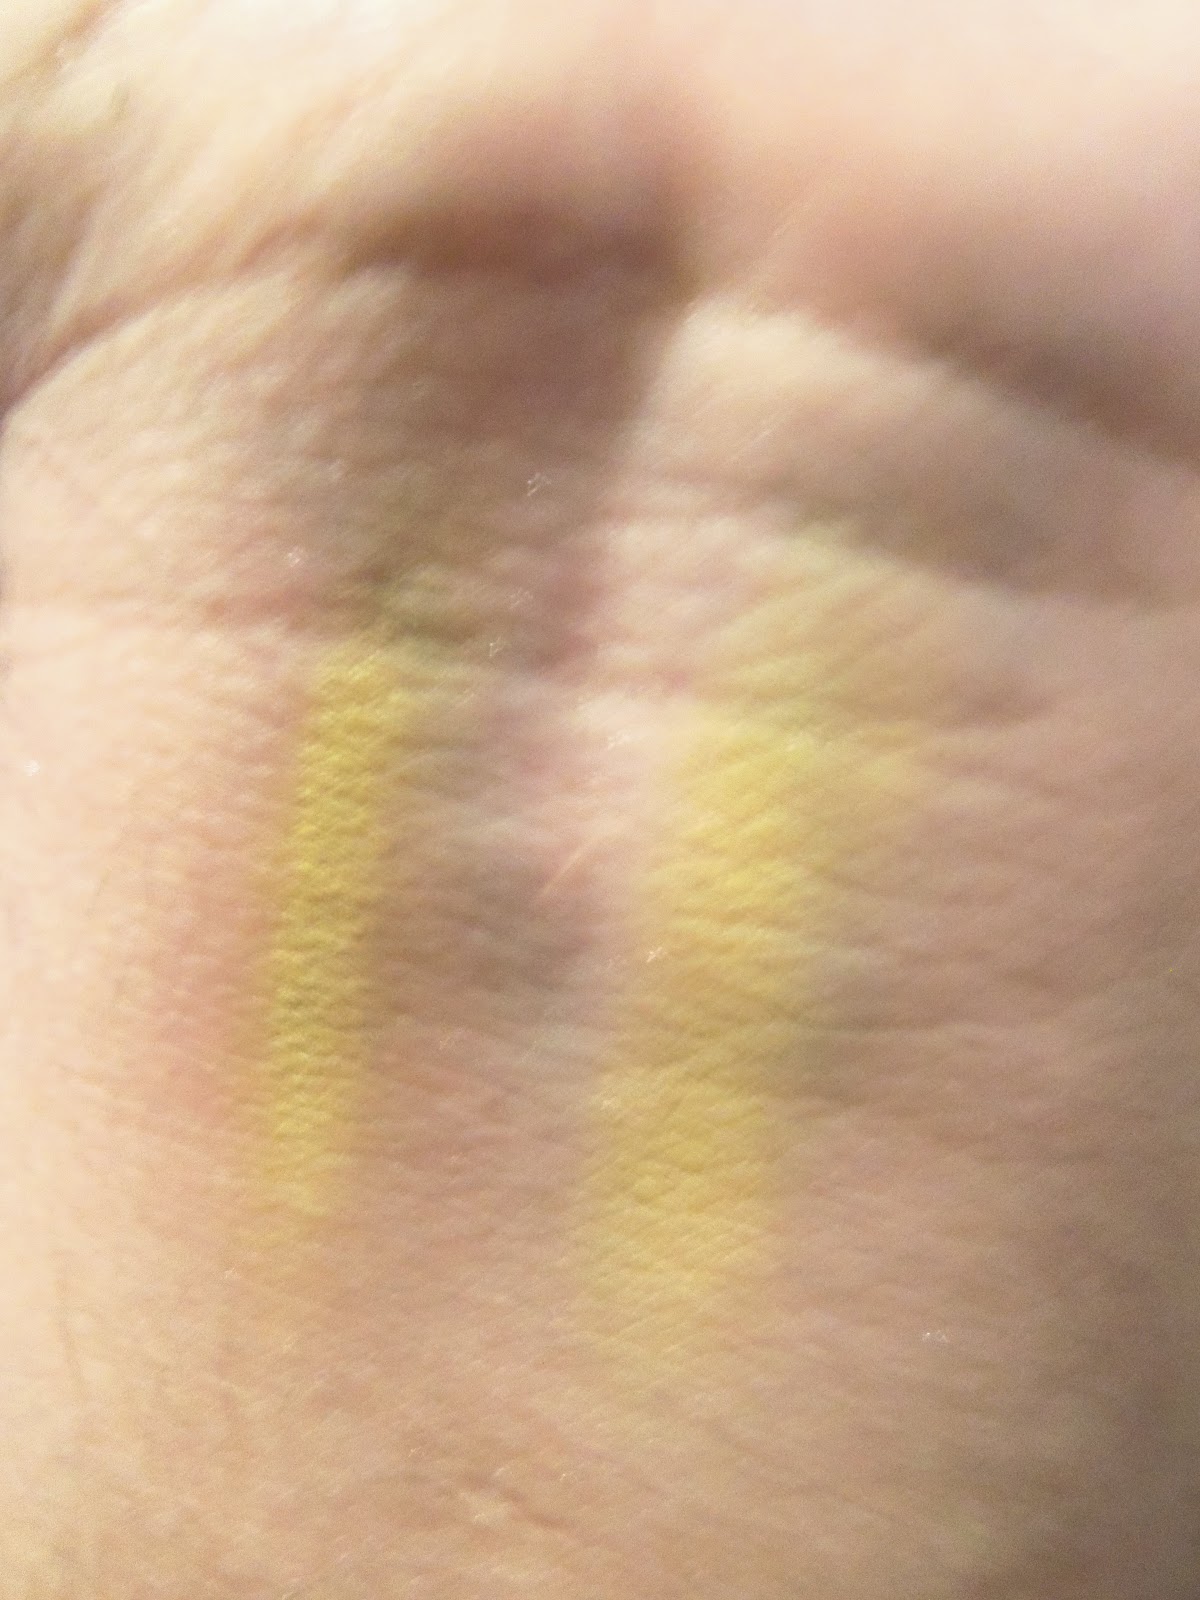
I've been on the hunt for a super bright yellow. I saw that NYX had one called Mellow Yellow. I was hesitant to purchasing it just because I was afraid that it wasn't going to be what I expected. I took a chance and bought it since was on sale at Ulta. The color is very pigmented over a white base and I fell in love with it! I've never tried any of their eyeshadows before but I will definitely be purchasing more in the months to come. With the eyshadow you can build it to the intensity that you want but you don't need much. The packing is similar to Mac's but square and wider. I believe the eyeshadow is $4 and something cents, I bought it for $3.50.
Swatch: Left: over White Base Right: No Base

Milani Powder Eyeshadows:

I got two of these eyshadows one is White Lie and the other is Olympian Blue. The packing is really cute it's round and is a bit similar to how Mac's eyeshadows are but bigger.First off by looking at these eyeshadows they look very pigmented! When I went to swatch them with my finger they were very pigmented and bright! They look amazing without a base but with a base the colors are super bold. They are easy to blend and a little goes a long way. I give these eyeshadows a perfect 10. The price for them are $5.99.
Swatches: Left: over Base Right: No Base

Milani Runway Eyes Fashion Shadows:

Swatches: Left: over Base Right: No Base

NYX Single Eyeshadow:

Swatch: Left: over White Base Right: No Base
Wednesday, November 28, 2012
Introducing Mallzee: The Perfect Online Mall
How many websites do you visit when online shopping? I usually visit 3-4 different websites looking for the things that I want. How awesome would it be to get everything you want on one site? It would be pretty amazing and luckily that website does exist! It's call Mallzee. Mallzee is all about creating a new experience for online shopping.
You create your own mall by picking your favorite stores and brands and it picks things you might be interested in off your personal style! One of the amazing things about this website is when you invite a friend to your mallzee, you as the "owner" get payed every time they purchase something from you and this isn't just limited to your friend it goes for anyone buying things from your mallzee!It's like your getting paid to shop, which I;m sure is every girl's dream.
This website will be up in running sometime in 2013. So far they have over 200 brands signed up: Urban Outfitters, New Look, Feel Unique and St. Tropez to name a few. Right now they have a competion going on you can win $155 (£100). So if you are interested in this website check it out.
Mallzee (link to website)
http://www.facebook.com/Mallzee
http://www.twitter.com/mallzeehq
You create your own mall by picking your favorite stores and brands and it picks things you might be interested in off your personal style! One of the amazing things about this website is when you invite a friend to your mallzee, you as the "owner" get payed every time they purchase something from you and this isn't just limited to your friend it goes for anyone buying things from your mallzee!It's like your getting paid to shop, which I;m sure is every girl's dream.
This website will be up in running sometime in 2013. So far they have over 200 brands signed up: Urban Outfitters, New Look, Feel Unique and St. Tropez to name a few. Right now they have a competion going on you can win $155 (£100). So if you are interested in this website check it out.
Mallzee (link to website)
http://www.facebook.com/Mallzee
http://www.twitter.com/mallzeehq
Monday, November 26, 2012
Maria Brink Inspired
I've recently discovered this awesome band In This Moment. I've heard their song "Blood" and thought it was super cool, so I checked out the MV and instantly fell in love with the lead singer's, Maria Brink, makeup.


Products used on eyes:
- Elf Eyelid Primer
- JLB Eyeliner Pencil in Black
- Elf Eyeshadow quad "Drama"
- Color Workshop Mascara
- Hard Candy Sheer Envy Skin Perfecting Primer
- Elf Tinted Moisturizer
- Cover Girl face Powder
- Color Workshop Bronzing Powder and pink blush
- Color Workshop Lip Liner in Red
- Color Workshop Lipstick in Red
Brushes Used:
- Elf "C" Brush
- Mini Kabuki Brush
- Elf Contour brush
- Color workshop blush brush
Get the look:
- Apply an eye-shadow primer or if you don't have one apply a concealer and go over it with a bit of powder. Apply a white base and blend over lid.
- Begin by applying a black base all over the eye,extending out in a wing..
- Apply a dark shimmer grey in the inner corner.
- Apply a black eyeshadow over the rest of the lid.
- Curl your lashes and add mascara.
- Using a stippling brush apply your foundation to your face.Blend it in and remember to put some on your neck.
- Next apply a powder to set in your foundation. For this I used a mini kabuki brush.
- Taking a contour brush and elf bronzing powder begin to contour your face, place it at the hollows of your cheek, temples, both sides of your nose (optional) and along your jaw line. This of course if optional and it will make your face appear slimmer.
- Now using your blush brush begin to apply a blush to the apple of your cheeks.
- Fill in your lips with a red lip pencil then apply a bright red lipstick to your lips.
Friday, November 23, 2012
8 Bit Cosmetics: Review
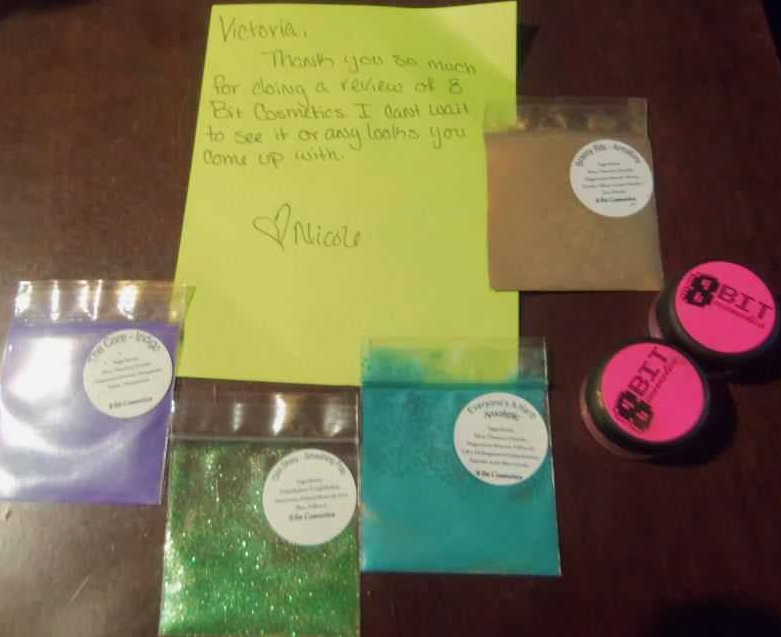
Swatches:

Right: with a white base
Colors/Collection:
Indigo-The Core
Armature- Brassy Bits
Apocalyptic-Everyone's A Hero
Smashing Pots-Ooo Shiny
Bat Ass Ginger- Everyone's A Hero
Protege- Everyone's A Hero
http://www.facebook.com/8BitCosmetics
http://www.etsy.com/shop/EightBitCosmetics?section_id=12460534
*Disclaimer: These eyeshadows were sent to me for reviewing purposes. This is my honest opinion.
*Disclaimer: These eyeshadows were sent to me for reviewing purposes. This is my honest opinion.
Wednesday, November 21, 2012
Holiday Makeup
This look is a cute holiday look that incorporates Thanksgiving colors such as Brown, Red and Orange. This is a super simple look and can be used for parties.

Products used on the eyes:
- Urban Decay Primer Potion
- NYX Jumbo Eye Pencil in Milk
- Color Workshop Palette (Daiquiri, Brick, White Gold, Copper & Blackout)
- JLB Eyeliner Pencil in Black
- Color Workshop Mascara
- Hard Candy Sheer Envy Skin Perfecting Primer
- Rimmel London Poreless Foundation
- Cover Girl Translucent Powder
- Color Workshop Bronzer
- Klean Color Blush Palette (Mauve Blush)
- NYC Liquid Lipshine: Nude
Brushes Used:
- Elf Eye-shadow brush
- Elf crease brush
- Elf C brush
- Color workshop angeled liner brush
- Color workshop Stippling/Blending Brush
- Elf Contour brush
- Color workshop blush brush
- Apply your face primer before you start to apply your eye-shadow primer that way it would have sunken into your skin and your will be ready for you to apply your foundation.
- Apply an eyeshadow primer or if you don't have one apply a concealer and go over it with a bit of powder.
- Using a crease brush I blended a shimmer brown above my crease.
- Now apply a brick red in the outer corner going half way on your lid and blending it into the brown.
- Now apply a orange color from the inner corner of your lid blending into the red, if you want a pop of color in the middle add a darker orange in the middle over the other colors..
- Using a different brush take a color close to you skin color and being to highlight under your brow.
- Now begin to line your eyes with a black eyeliner and then add some mascara. You can add fake lashes if you want for extra drama.
- Using a stippling brush apply your foundation to your face.Blend it in and remember to put some on your neck.
- Next apply a powder to set in your foundation. For this I used the stippling brush.
- Taking a contour brush and elf bronzing powder begin to contour your face, place it at the hollows of your cheek, temples, both sides of your nose (optional) and along your jaw line. This of course if optional and it will make your face appear slimmer.
- Now using your blush brush begin to apply a blush to the apple of your cheeks.
- I applied a nude lip gloss to my lips.
Subscribe to:
Posts (Atom)