Friday, August 31, 2012

Color Explosion

As with my previous looks you can tell I love color! This look I came up with for going out.


Products used on the eyes:
  • Elf Eyelid Primer
  • BH Cosmetics 88 Pallete (White, Baby blue, medium Blue, dark blue, Green and Yellow)
  • Color Workshop Pallete (Cream)
  • NYX Jumbo Eye Pencil in Milk
  • JLB Eyeliner pencil in black
  • Santee Mascara
Products used for the face:
  • Hard Candy Sheer Envy Skin Perfecting Primer
  • Rimmel London Stay Matte Foundation
  • True blend Mineral Powder
  • Elf Bronzing Powder
  • A very light pink blush
Brushes Used:
  • Elf C brush
  • Color workshop flat liner brush
  • Color Workshop Flat blending brush
  • Color workshop Stippling/Blending Brush
  • Elf Contour brush
  • Color workshop blush brush
Lips:
  • NYC Lipstick in Chiffon
  • BH Cosmetics Lip gloss in Studious 
Get The Look:
  • Apply your face primer before you start to apply your eye-shadow primer that way it would have sunken into your skin and your will be ready for you to apply your foundation. 
  • Apply an eyeshadow primer or if you don't have one apply a concealer and go over it with a bit of powder.
  • Begin by placing a white base on your lid and blending it over your lid, this will help make the color pop more than a primer will do on its own.
  • Now using your eye-shadow brush begin to apply a white color in the outer corner going about 1/3 onto the lid.
  • Using the same brush or a different one, apply a light baby blue color next to the white blending the two together.
  • Next apply a blue darker the the baby blue and apply it next to it blending into each other.
  • Finally apply a dark blue into the outer corner and blend into the other blue.
  • Line your eyes and create a wing.
  • Using a flat liner brush begin to apply a green color along the wing and under your lower lashes.
  • Using a flat blending brush apply the same green into the crease, don't forget to blend!
  • Using the same brush apply a yellow over the green in the crease and blend together.
  • Apply a highlight.
  • Apply a white eyeliner to your waterline. 
  • Apply Mascara. 
  • Using a stippling brush apply your foundation to your face.Blend it in and remember to put some on your neck.
  • Next apply a powder to set in your foundation. For this I used the stippling brush.
  • Taking a contour brush and elf bronzing powder begin to contour your face, place it at the hollows of your cheek, temples, both sides of your nose (optional) and along your jaw line. This of course if optional and it will make your face appear slimmer.
  • Now using your blush brush begin to apply a blush to the apple of your cheeks. 
  • Apply a shimmering pink lipstick.
  • Go over the lipstick with a pink lip gloss. 

Thursday, August 30, 2012

Back to school

This is the beginning of my school series. So without further to do let's get started.


Products used on eyes:
  • Elf eyelid primer
  • Santee Pallet (A light pink and medium dark pink)
  • Elf quad "Drama" (Black & White)
  • Mac 'Embark' (Brown)
  • Elf liquid eyeliner pen in black
  • JLB Eyeliner in Black
  • Color Workshop Mascara
Products used for the face:
  • Clean and Clear Moisturizer
  • True blend Mineral Powder
  • Color Workshop Peachy blush & Dark brown blush 

Lips:
  • Wet n Wild "Just Peachy"
  • NYC Liquid Lip Shine (Nude)
Brushes Used:
  • Elf  Eye-shadow brush 
  • Elf Crease Brush
  • Mini Kabuki Brush
  • Elf Contour brush
  • Color workshop blush brush
Get the look:
  • Apply an eye-shadow primer or if you don't have one apply a concealer and go over it with a bit of powder, in this case I've used the concealer and powder.
  • Apply a white base and blend over lid.
  • Using a flat eye-shadow brush begin to apply a pink, in this case we are going to mix both the pinks before putting it on our lids, then apply all over you lid without going over the crease.
  • Taking the brown eye-shadow we are gonna use a blending brush and apply it from the outer corner into the crease.
  • Using that same brush we are gonna apply black from 1/3 in the outer corner into the crease.
  • Going back to the eye-shadow brush we are going to apply a white from the inner corner blending it into the pink and crease and also apply it as a highlight.
  • Line your eyes and tight line and add liner to your bottom lashes.
  • Apply a white liner to your water line.
  • Add two coats of your favorite mascara.
  • For the face I just applied powder over the moisturizer that I applied earlier.
  • Taking a contour brush and blush darker than your skin tone begin to contour your face, place it at the hollows of your cheek, temples, both sides of your nose (optional) and along your jaw line. This of course if optional and it will make your face appear slimmer.
  • Now using your blush brush begin to apply blush to the apple of your cheeks.
  • Apply a  peach lipstick and go over it in a nude lip gloss.

Saturday, August 25, 2012

BH Cosmetics


I had purchased many items from BH Cosmetics a couple of months of go through a sale they were having. I've been trying to review them but every time I am going to something comes up and I have to delay the review. So with out further to do let's get started.

 The first thing I'm going to review is the 120 4th edition pallet. This pallet consists of mostly shimmery colors. However, some are not as shimmery as others. These colors are so vibrant and gorgeous. When you put a white base under them the colors becomes even brighter as you will see from my swatches. I will admit I  have not used all the colors from the pallet. I give this one two thumbs up it is worth the buy, especially when they are on sale.

L: Without a base R: With a white base


The second pallet I bought was the 88 Matte pallet and if you seen my tutorials you'll know that this is my favorite pallet. I love the colors they are so bright and just gorgeous. A little goes a long way. When used over a white base the colors become more intense. The only disappointment with this pallet is the yellow isn't as bright as I would want it to be. Also,another thing that is a disappoint with all their pallets is that the glue that holds the eye-shadows in place isn't very good I have two eye-shadows, one in each pallet, that pops out, but if you can live with that then the pallets are amazing. This is also another great buy since the colors are so amazing.
Swatches:
L: Without Base R: With a white base


I had gotten three eyeliners from them as well. The gel eyeliner is amazing it stays all day and doesn't budge at all,which is awesome the one I got is in onyx. However,the only thing that I do not like is that it is not as dark as I want it to be I have to go over it with an eye-shadow to make it dark.


I got the liquid eyeliner pen. That one is my absolute favorite. It easy to use and can give me a thin line when I want one or a thick line. It is amazing. It's budge proof as well which is good for this crazy Texas weather. I would say it is a must buy from them.


Finally,the last eyeliner I bought was their pencil liner in frost. I regret buying this. It doesn't show up on my waterline when I use it. So I tried to use it as a base to get my money's worth out of it. It hurts to do so, but of course I would probably keep trying to find some way to use it. I don't like this liner I don't know if the other ones are good so I can't speak for their whole collection all I know is that Frost isn't worth the buy. It's completely awful!
Swatches: Gel, Liquid pen, Frost


The last things I bought were two of their lip glosses. I got Studious and 80's Diva. Studious is more of a very light almost nude pink it's super pretty. 80's Diva is a very hot pink color, more or less and I love it.Out of these two my go to color is Studious. Both glosses are great in terms of color payout. The only things that I do not like is that they have that sticky feel to them and the colors don't last that long. I think they are great for the price they are sold at. I would probably try other colors from their collection.
Top: Studious Bottom: 80's Diva

Wednesday, August 22, 2012

Liebster Award

"The Liebster Award is given to up and coming bloggers who have less than 200 followers. What is a Liebster? The meaning: Liebster is German and means sweetest, kindest, nicest, dearest, beloved, lovely, kind, pleasant, valued, cute, endearing, and welcome."

I received this nomination from Dani Duffy and it is such an honour! Thank you so much. 


The Rules:
1. Each person must post 11 things about themselves.
2. Answer the questions that the person who tagged you created and then make 11 questions of your own for the people you tag. 
3. Choose 11 people and link them in your post.

4. Go to their page and tell them.

5. No tag backs!

OK, so here it goes. Here are 11 things about me!
  • I'm 21 years old.
  • I'm a make-up addict.
  • I'm a college student.
  • I love hello kitty.
  • My favorite color is purple.
  • I'm the only girl out of 4 kids.
  • My hair has been many colors, but right now it's just black.
  • I hate wearing heels, I prefer wearing converse and my boots.
  • I love animals especially tigers and lions.
  • I'm addict to tea.
  • I make youtube videos.
Now, the questions I was asked:

1. What made you start blogging?
What made me start blogging was just the fact that I wanted to be able to show people different things that I couldn't feature in my youtube videos.

2. What is your favorite lipstick?
 My favorite lipstick at the moment is my Wet n Wild Just peachy. 

3. Are you a tea or coffe drinker?
I'm kind of both but I drink more tea than coffee.

4. What time do you get up in the morning?

I usually wake up at 11.

5. What book are you currently reading?

I'm currently not reading any book, I wish I was though.

6. What colour nail varnish are you wearing right now?
I'm wearing a glittery orange and hot pink.


7. What music do you like listening to?
I love listening to rock but Ilisten to everything.

8. What is your most prized posession?

My make-up, dog and hello kitty doll.

9. What is the furthest place you have travelled to?

To Florida from Texas.

10. If you were having a romantic meal cooked for you, what would be on the menu?

I think I would make my boyfriend's favorite food which I can not currently think of at the moment.

11. If you could close your eyes and be taken anywhere in the world, where would you be when you opened your eyes?

Now for my questions:
  1. What's your favorite color?
  2. What do you do in your spare time?
  3. What's your favorite thing about being a blogger?
  4. What's your idea of the "Best Day Ever"?
  5. What's your favorite make-up brand?
  6. Where you you love to live?
  7. What's your favorite eyeliner?
  8. If you could drink one thing for the rest of your life what would it be?
  9. Are you an animal lover?
  10. What's your favorite trend?
  11. What's your Dream Job?
I noimate these lovely ladies:

Toxylicious
Young Mum's Guide To Survival
Beauty Heaven
The Jojo Show
A look Into Delabelle
Tales of the Younger Twin
Kreamiblush
Reason to Procrastinate
Beauty Addiction: Elégante Lady
MishMreow
Forver Young & Fab in the CIty


Friday, August 17, 2012

Updates

Hello Peoplez, 
So ever day this week I've made a tutorial. The looks are different but they all have one thing in common they are colorful! I've been hard at work trying to get a video posted. I've been trying since Tuesday and I don't know why youtube wouldn't take it but anyways it is up now. So I've been busy making tutorials and I wanted to blog today but didn't really have anything to blog about so I thought I would just update y'all on my current activities. Oh, before I forget I posted my BH Cosmetics Review, you can find it in the review section, but let me know if it's now showing up. I've been having problems with it, but I think I fixed it. Changing topics, I've been nominated for the Liebster Blog Award by Dani Duffy of My Make-up and Beauty Obsession! It's such an honor! Well changing subjects again, I'm super excited about my up coming looks! If you are excited to see them follow my twitter I usually release a preview of the looks the night before upload the videos . Also, I have been hard at work creating a header and an ad button and if you would like to swap ads/buttons let me know. Well have a great day everybody, I'll talk to you soon.

-Tori

Wednesday, August 15, 2012

Opposites Attract: Blue & Green

I came up with this super fun, colorful look. I use two colors and they are reversed in order on each eye and also are a different shade.

Products used on eyes:
  • Elf eyelid primer
  • BH Cosmetics 88 Matte Pallet (Grass Green, Dark Blue, Baby Blue, Dark Green)
  • Color Workshop Pallet (Highlight: Cream)
  • JLB Eyeliner in Black
  • Santee Mascara
Products used for the face:
  • Clean and Clear Moisturizer
  • True blend Mineral Powder
  • Elf Bronzing Powder
  • Color Workshop Peachy blush

Lips:
  • NYC Liquid Lip Shine (Nude)
Brushes Used:
  • Elf  Eye-shadow brush 
  • Elf Crease Brush
  • Mini Kabuki Brush
  • Elf Contour brush
  • Color workshop blush brush
Get the look:
  • Apply an eye-shadow primer or if you don't have one apply a concealer and go over it with a bit of powder, in this case I've used the concealer and powder.
  • Using a flat eye-shadow brush begin to apply a grass green color all over you lid.
  • Wipe off the brush and apply a baby blue to your other lid.
  • Moving on to a crease brush apply a dark blue to the lid that has the green, blend into the outer corner taking it into the crease. Do this for the other lid but using a dark green.
  • Apply a highlight color and blend into the crease colors. Apply some to the inner corner.
  • Tight line your top lid and line your water-line.
  • Apply Mascara
  • For the face I just applied powder over the moisturizer that I applied earlier.
  • Taking a contour brush and elf bronzing powder begin to contour your face, place it at the hollows of your cheek, temples, both sides of your nose (optional) and along your jaw line. This of course if optional and it will make your face appear slimmer.
  • Now using your blush brush begin to apply blush to the apple of your cheeks.
  • Apply a nude lipstick or lip gloss.
Tutorial(<--Click here to go to the tutorial)

Sunday, August 12, 2012

Wet n Wild Lipstick


A couple of weeks ago I went to Houston and my aunt had bought me a Wet n Wild Lipstick and a make-up sponge but I'm going to write a review for that tomorrow. I have never tried any of their lipsticks, so I was ecstatic to finally be able to try one. The one I got was 903C Just Peachy. I am in love with this lipstick! Ever since I've gotten it, I have been wearing it. The color is so pretty and I just absolutely love it. I t doesn't have that sticky feel that some lipsticks have when you wear them. Overall, this lipstick is amazing and if you haven't tried it you should
.

Saturday, August 11, 2012

ifabbo Endorsed/Weekend Plans

Hello Peoplez,
Yesterday I was notified that my application has been approved and I am now endorsed by ifabbo! I'm so happy about it. I have no idea what else to say but I'm totally looking forward to this experience. :)

Finally the weekend has arrived! This weekend I was planning on putting up more reviews but my friend/sista from another mother is coming over today and I haven't seen her in what feels like forever. So my original plans will be put on hold until tomorrow. Today we might end up doing a "photo-shoot" maybe, who knows but if there is one I will definitely put pictures up. What are your guy's plan for the weekend?

I think that's enough blogging for the day I'm gonna go take a nap since I'm running on 4 hours of sleep.

Have a super fantabulous weekend!
-Tori

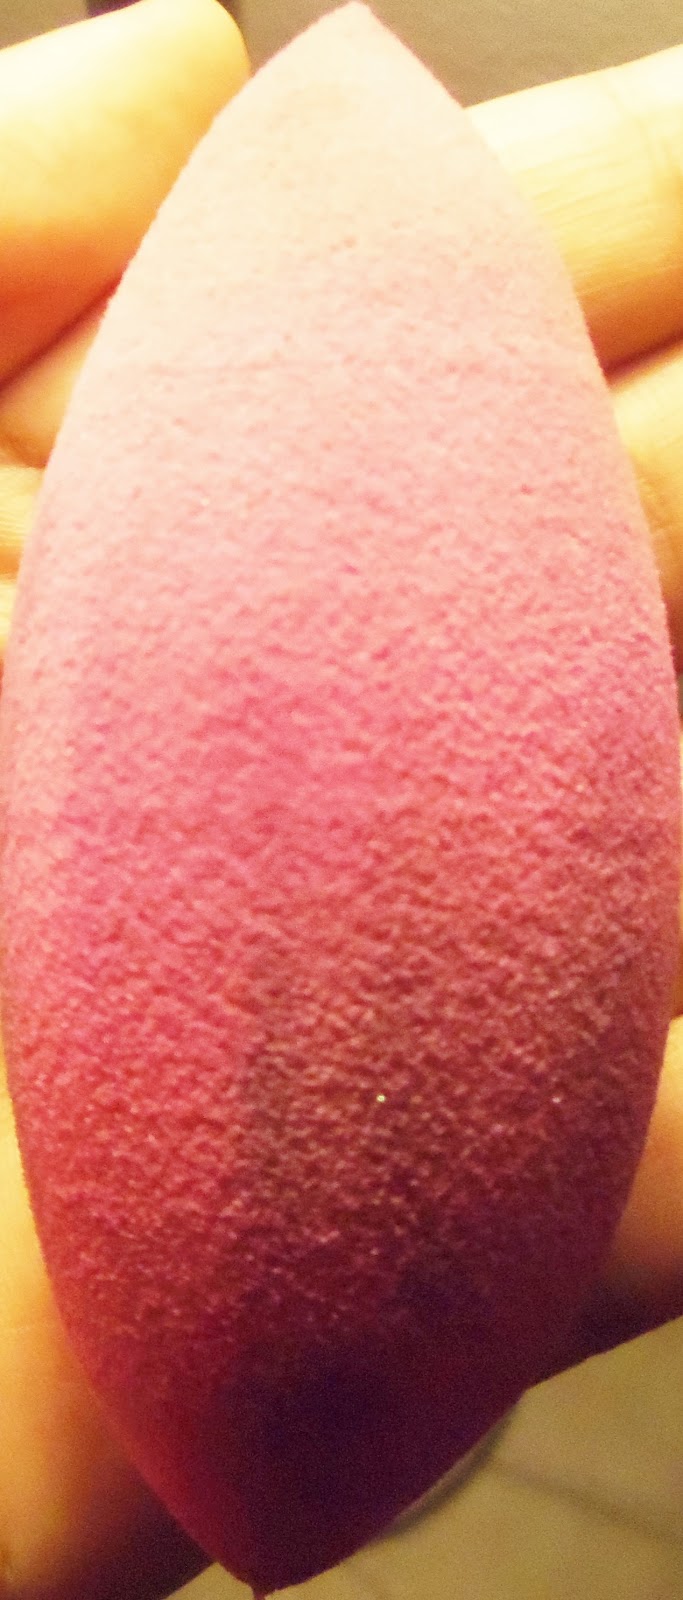
London Soho New York Beauty Sponge

London Soho New York Beauty Sponge


As mentioned in yesterday's post while I was in Houston my aunt had bought me a lipstick and make-up sponge. I've been wanting one for the longest just to try it out. I love this sponge I think it's better to use than a brush, since it can better apply foundation under your eyes and around your nose. The only thing that I do not like about it, is that is easily stains. No matter how much I clean it I still have stains from my foundation on it. I can totally live with that but I rather it maintain it's pinkness. I know there are different one out there but I think this is the cheapest. I believe it was $7.99 at Wal-greens.

Monday, August 6, 2012

M.I.A

Hello peoplez,
I know lately I haven't really been posting videos, blogging, or tweeting. I kinda been with my boyfriend and I haven't really been able to get on a computer and for the video posting part I left my memory card in Houston and haven't been able to make any videos and I currently have none saved to my computer. But this week I will be posting a review of my Bh Cosmetics pallets and other things from the company that I purchased. By next week I will be able to start posting videos since I will be getting my card back this weekend and I already have ideas of what videos I wanna make. So keep an eye out for that and I shall talk to you soon. :)

Tuesday, July 31, 2012

Pink Ombre Look

I must admit I'm addicted to the Ombre trend, I think it's super cool and although I don't have my hair or nails like that. I decided to incorporate that trend into my make-up look.

Products used on eyes:
  • Urban Decay Priming Potion
  • Sephora Pencil Liner in Black
  • NYX Jumbo Eye Pencil in Milk
  • BH Cosmetics 88 Matte Pallet (Black, Dark Pink,Medium Pink,and White)
  • Rimmel London Sexy Curves Mascara
Products Used on Face:
  • Elf Tinted Moisturizer
  • Elf Pressed Powder
  • Color Work Shop Blush and Contour
Products Used on Lips:
  • Nivea Lip Balm
Brushes Used:
  • Elf eye-shadow brush
  • Color Workshop Stippling Brush
  • Elf Contour Brush
  • Color Workshop Blush brush
Get the look:
  • Apply your face primer before you start to apply your eye-shadow primer that way it would have sunken into your skin and your will be ready for you to apply your foundation.
  • Apply an eye-shadow primer or if you don't have one apply a concealer and go over it with a bit of powder, in this case I've used the concealer and powder.
  • Take your pencil eyeliner and begin to line your top lid. Smudge ita bit.
  • Next apply a white base above the liner and try to prevent them from touching.
  • Using an eye-shadow brush apply a black eye-shadow on the liner.
  • Wipe off your brush and apply a dark pink above the black. Blend them together.
  • Next apply a medium to light color pink above the dark pink. Blend together. This color should be in the crease area. 
  • Now add a white eye-shadow and blend it into the pink.This can also be used as your highlight color as well.
  • Line your waterline and add mascara.
  • Next apply a powder to set in your foundation. I used the stippling brush for this.
  • Using a contour brush and elf bronzing powder begin to contour your face, place it in the hollows of your cheek, temples, both sides of your nose and along your jaw line. This of course is optional.
  • Apply a rosy pink blush to your cheeks.
  • For the lips I just used my lip balm.
http://www.youtube.com/watch?v=JBGbYNxz5Y8&feature=plcp

Wednesday, July 25, 2012

Influenster Summer VoxBox 2012


undefined

So a couple of weeks ago I was notified by Influenster that I was picked to review products for their Summer VoxBox. A week ago I recieved my box and I couldn't wait to open it. I received six products: Hawaiian Tropic Silk Hydration Lotion Sunscreen SPF30, Sally Hansen Magnetic Nail Color, Tampax and Always Radiant Collection, Sally Hansen Nails and Cuticles Hand Creme, Quaker Soft Baked Bar in Banana Nut Bread and Clear Scalp & Hair Beauty Therapy. I decided to test these products for a week starting with the day I got them. So without further to do I shall tell you guys what I think of them. :)


I shall start off with the Hawaiian Tropic Silk Hydration Lotion Sunscreen SPF30. The bottle I received is a 2 Fl. Oz bottle, the price for ,I'm guessing, a regular 6 Fl. Oz bottle is $8.99. I think for that price is pretty good considering that this sunscreen is a lotion as well and will definitely keep your skin hydrated as it protects you from the sun. I definitely must admit the best thing about this sunscreen lotion is the smell, I absolutely love it! It's not very strong if your one of those people who are picky about smells.This lotion Sunscreen has 12-hour moisturization when out in the sun. Overall I would say this is a good product, and if you don't believe me you should try it yourself. :)


Moving right along, the next product I'm about to discuss, I absolutely LOVED like love soooo much! This product is the Sally Hansen Magnetic Nail Color. The color I received is Silver Element, which is just well basically a silver color but it's absolutely gorgeous. I'm not gonna lie ever since I've received this nail polish I've been rocking it on my nails and gotten so many compliments on it. The only thing about this product that I don't like which I don't think it's a big deal but others might find it to be is that the designs aren't all consistent some are a lot more noticeable while some are barely noticeable. I don't know if maybe because I didn't hold the magnetic over the nail polish long enough but I shall continue to mess around with it to see if that's the case. However, I think it's actually cool since no nail is not really alike as least with the patterns. The cost for this nail polish is some what pricey if your on a budget, it's $9.99 but it's a lot cheaper than the one sold at Sephora which I believe is like $15. So, compared to that it's definitely a good price. I would recommend this product to every girl who loves trying something new on their nails, trust me you won't be disappointed.


Talking about Sally Hansen, I will tell you my thoughts on the Nails and Cuticles Hand Creme. Honestly, I have a love/hate kind of thing going on with this product. When I apply it, it makes my hands feel extremely soft and I love it but when I don't my hands feel really weird, I guess you can say like they are dry and this started happening after using this product.  However, I do like that this hand creme is good for  your nails it conditions them. It's Active moisture complex formula with ceramides helps to lock in nutrients so hands maintain their ideal moisture level. It last 24-hours, even after washing your hands. For a full size bottle of this lotion will cost you $5.99. I also will say that I do love the smell of this lotion, go figure :), it's a very faint citrus smell but if you're not found of fragrances like this than this isn't the product for you. All in all I would recommend this lotion to people just because it does so many good things for your hands.


The product I have a love/hate relationship with is the Tampax and Always Radiant Collection. This collection consist of tampons, pads, and liners that tailor to a women's need. This collections also consist of a cute pouch. I love that the pad wrappers are re-seal-able making it easier to "disguise" your period. The pad, when you open it, has an arrow telling you which way is the front which I think it's cool. Let's face it ladies we all have the moment when we don't know which way goes which. The only thing that I don't love about this collection is that the pads and I believe the liners consist of a scent. It smells pretty but I don't like that it's on the pad, I don't know it's just weird and plus it can cause your pH system in your vagina to change and that can cause you to get an infection. The price for this collection depends on the box.

This Quaker Soft Baked Bar in Banana Nut Bread is absolutely delicious, I love it. It is made with real bananas and almonds. It has 5g Fiber, 20% of daily value of 5 B vitamins and 6g of Proteins. I think these bars are ideal for everyone especially if you are trying to eat healthy or trying to find healthy snacks for your kids. This are $3.29 for a package of bars. I think it's totally work the price and I will definitely be buying me some.

The last and final products I received are the Clear Scalp & Hair Beauty Therapy shampoo and conditioner. These products are suppose to nourish the scalp and make your hair stronger in 7 days. My hair is very fragile and I've been wanting a shampoo and conditioner that will help make my hair stronger since I want to grow it out. And trust me when I say this product does do what it says my hair feels sooooo much stronger than it did before. I definitely love it! The price for them varies by size and there are two sizes a 12.7 oz and a 12.9 oz and price ranges between $4.99-$5.99. If your hair is fragile and could use some help I think you should  absolutely buy them. It's well worth the money.

*Disclosure: These products were sent to me from Influenster for testing purposes.

Tuesday, July 24, 2012

Colorful Classy Summer Look

I got inspired by my Tinker Bell Shirt & of course Tinker Bell herself, she is super classy, sassy and well one of my favorite disney characters!

Products used on eyes:
  • Elf eyelid primer
  • NYX Jumbo Eye Pencil in Milk
  • BH Cosmetics 88 Matte Pallet (Yellow, Green and a highlight color)
  • Sephora Flash Eyeliner in Black
  • Color Workshop Mascara
Products used for the face:
  • Hard Candy Sheer Envy Skin Perfecting Primer
  • Rimmel London Stay Matte Foundation
  • True blend Mineral Powder
  • Elf Bronzing Powder
  • A very light pink blush
Lips:
  • Color Workshop Red lip liner
  • Color Workshop Red Lipstick
Brushes Used:
  • Elf  Eye-shadow brush 
  • Angled Eye-shadow Brush
  • Color workshop Stippling/Blending Brush
  • Elf Contour brush
  • Color workshop blush brush
Get the look:
  • Apply your face primer before you start to apply your eye-shadow primer that way it would have sunken into your skin and your will be ready for you to apply your foundation.
  • Apply an eye-shadow primer or if you don't have one apply a concealer and go over it with a bit of powder, in this case I've used the concealer and powder.
  • Apply a white base to the middle of your lid and blend out.
  • Using a eye-shadow brush pat on a yellow color from the inner corner to the middle of your lid.
  • Wipe your brush, then apply a green color from the middle to the outer corner. Make  sure to blend the middle so that there is no harsh lines. 
  • Taking a crease brush blend the green into the crease.
  • Apply a highlight color to the brow bone.
  • Tight line your upper lid and line your waterline.
  • Add two coats of your favorite mascara. 
  • Using a stippling brush apply your foundation to your face.Blend it in and remember to put some on your neck.
  • Next apply a powder to set in your foundation. For this I used a mini kabuki brush.
  • Taking a contour brush and elf bronzing powder begin to contour your face, place it at the hollows of your cheek, temples, both sides of your nose (optional) and along your jaw line. This of course if optional and it will make your face appear slimmer.
  • Now using your blush brush begin to apply a blush to the apple of your cheeks.
  • Line your lips and fill them in. Then apply lipstick.
- http://youtu.be/qQKS0WvrXXQ

Wednesday, July 11, 2012

Clubbing Look: Burgundy w/ Black cut crease


products used on eyes:
  • Elf eyelid primer
  • BH Cosmetics 88 Matte Pallet (Reddish-Brown and Black)
  • BH Cosmetics 120 Pallet 4th edition (Reddish-Brown)
  • Sephora Flash Eyeliner in Black
  • JLB Eyeliner in Black
  • Color Workshop Mascara
Products used for the face:
  • Hard Candy Sheer Envy Skin Perfecting Primer
  • Rimmel London Stay Matte Foundation
  • True blend Mineral Powder
  • Elf Bronzing Powder
  • A very light pink blush
Brushes Used:
  • Elf  Eye-shadow brush 
  • Angled Eye-shadow Brush
  • Color workshop Stippling/Blending Brush
  • Elf Contour brush
  • Color workshop blush brush
Get the look:
  • Apply your face primer before you start to apply your eye-shadow primer that way it would have sunken into your skin and your will be ready for you to apply your foundation.
  • Apply an eye-shadow primer or if you don't have one apply a concealer and go over it with a bit of powder, in this case I've used the concealer and powder.
  • Using an eye-shadow brush apply a shimmer reddish-brown to your lid. Make sure to pat it on.
  • Using the same brush apply a matte reddish-brown eye-shadow over the shimmer.
  • Next using the angled eye-shadow brush run it along a black eyeliner and begin to place from the outer corner to 1/3 of your crease.
  • Using a blending brush. blend black eye-shadow in the crease and take it a lit bit above the crease.
  • Next apply apply eyeliner to the base of your lases and line your waterline.
  • Apply a highlight to your brow bone.
  • Add Mascara, and false lashes if you desire.
  • Using a stippling brush apply your foundation to your face.Blend it in and remember to put some on your neck.
  • Next apply a powder to set in your foundation. For this I used a mini kabuki brush.
  • Taking a contour brush and elf bronzing powder begin to contour your face, place it at the hollows of your cheek, temples, both sides of your nose (optional) and along your jaw line. This of course if optional and it will make your face appear slimmer.
  • Now using your blush brush begin to apply a blush to the apple of your cheeks.

Friday, July 6, 2012

Bronze Eye


Products used for the eyes:
  • NYX Eye-shadow Base in skin-tone
  • BH Cosmetics 120 4th edition pallet (Bronze)
  • BH Cosmetics 88 Matte Pallet (Brown and a highlight color)
  • Wet n Wild Brown Eyeliner
  • Color Workshop Mascara
Products used for the face:
  • Hard Candy Sheer Envy Skin Perfecting Primer
  • Rimmel London Stay Matte Foundation
  • True blend Mineral Powder
  • Elf Bronzing Powder
  • A very light pink blush
Brushes Used:
  • Elf  Eye-shadow brush 
  • Angled Eye-shadow Brush
  • Color workshop Stippling/Blending Brush
  • Elf Contour brush
  • Color workshop blush brush
Get the look:
  • Apply your face primer before you start to apply your eye-shadow primer that way it would have sunken into your skin and your will be ready for you to apply your foundation.
  • Apply an eye-shadow primer or if you don't have one apply a concealer and go over it with a bit of powder, in this case I've used the concealer and powder.
  • Using an eye-shadow brush apply a shimmer bronze color to your eye-lid.
  • Taking a blending brush apply a dark matte brown into your crease and blend.
  • Next using an eye-shadow brush apply a matte bronze color over the shimmer.
  • Using an angled eye-shadow brush apply the matte bronze to your lower lash line, and use it to apply a brown eyeliner or brown eye-shadow to your top lash line.
  • Apply a highlight to your brow bone.
  • Add Mascara, and false lashes if you desire.
  • Using a stippling brush apply your foundation to your face.Blend it in and remember to put some on your neck.
  • Next apply a powder to set in your foundation. For this I used a mini kabuki brush.
  • Taking a contour brush and elf bronzing powder begin to contour your face, place it at the hollows of your cheek, temples, both sides of your nose (optional) and along your jaw line. This of course if optional and it will make your face appear slimmer.
  • Now using your blush brush begin to apply a blush to the apple of your cheeks.
Tutorial: http://www.youtube.com/watch?v=_qvKisxSAK4&feature=plcp

Tuesday, June 26, 2012

My Birthday Look

So this year I turned the big 21! And I wanted to go all out with my look (clothes make-up hair the whole nine yards). Well I came up with this beautiful colorful look and it definitely got me noticed. :)

Products used on eyes:
  • Elf eyelid primer
  • NYX Jumbo Eye Pencil in Milk
  • BH Cosmetics 88 Matte Pallet (Pink,Purple, Red and White)
  • ELF Liquid Eyeliner Pen in Black
  • Color Workshop Mascara
Products used for the face:
  • Hard Candy Sheer Envy Skin Perfecting Primer
  • Rimmel London Stay Matte Foundation
  • True blend Mineral Powder
  • Elf Bronzing Powder
  • A very light pink blush
Products used for Lips:
  • L.A Colors lipstick in Hint
  • BH Cosmetics lip-gloss in Studious
Brushes Used:
  • Elf Eye-shadow brush
  • Elf blending brush
  • Color workshop flat blending brush
  • Color workshop Stippling/Blending Brush
  • Elf Contour brush
Get The Look:
  • Apply your face primer before you start to apply your eye-shadow primer that way it would have sunken into your skin and your will be ready for you to apply your foundation. 
  • Apply an eyeshadow primer or if you don't have one apply a concealer and go over it with a bit of powder.
  • Begin by placing a white eyeliner on your lid and blending it over your lid, this will help make the color pop more than a primer will do on its own.
  • Now taking your eye-shadow brush place a white eye-shadow in the outer corner of your eye.Pat the color on your eye, this will help make the color a bit more intense.
  • Wipe your brush and then place a red eye-shadow next to the white and blend it into the white to get rid of the harsh line between them. Do this for the pink and purple.
  • Take the purple from the inner corner and and blend it into the crease.
  • Using a different brush take a color close to you skin color and being to highlight under your brow. You can also place the color at the inner corner near your tear ducts to catch light, this step of course is optional.
  • Now begin to line your eyes with a black eyeliner and then add some mascara. You can add fake lashes if you want for extra drama.
  • Using a stippling brush apply your foundation to your face.Blend it in and remember to put some on your neck.
  • Next apply a powder to set in your foundation. For this I used the stippling brush.
  • Taking a contour brush and elf bronzing powder begin to contour your face, place it at the hollows of your cheek, temples, both sides of your nose (optional) and along your jaw line. This of course if optional and it will make your face appear slimmer.
  • Now using your blush brush begin to apply a blush to the apple of your cheeks. 
Tutorial: http://www.youtube.com/watch?v=B5UuOUoi2yE&feature=plcp

Monday, June 25, 2012

Kat Von D's Saint Inspired

I love Kat Von D's looks that she has created. I wanted to show you how you can get those same looks without having to purchase her pallet which is pricey for some people. I will be doing her looks over time so you too can create your favorite look.

Products used for the eyes:
  • Almay's Bright Eye Concealer
  • NYC Pressed Powder
  • L.A Colors"Darling" Pallet (Dark Brown & Medium Brown)
  • Color Workshop Pallet (White Gold)
  • BH Cosmetics Eyeliner Pen
  • Color Workshop Mascara
Products used for the face:
  • Hard Candy Sheer Envy Skin Perfecting Primer
  • Rimmel London Stay Matte Foundation
  • True blend Mineral Powder
  • Elf Bronzing Powder
  • A very light pink blush
Brushes Used:
  • Elf "C" Eye-shadow brush 
  • Color workshop Stippling/Blending Brush
  • Elf Contour brush
  • Color workshop blush brush
Get the look:
  • Apply your face primer before you start to apply your eye-shadow primer that way it would have sunken into your skin and your will be ready for you to apply your foundation.
  • Apply an eye-shadow primer or if you don't have one apply a concealer and go over it with a bit of powder, in this case I've used the concealer and powder.
  • Using an eye-shadow brush or a blending brush apply a dark matte brown to the crease of your eye. Make sure to blend it out.
  • Next using the same brush apply a medium brown to the crease and half of your eyelid.
  • Using a different brush if you wish apply a white yellow color to the rest of your lid.
  • Now taking a light brown color blend it into the other colors to tie all the colors together.
  • Now taking that white gold color apply it under your brow bone as a highlight.
  • Using an eyeliner begin to line the upper lash line and wing it out.
  • Add Mascara, and false lashes if you desire.
  • And for the total Kat Von D look add stars to the side of your face if you want.
Tutorial: http://youtu.be/dsM09NOMzbY

Wednesday, June 20, 2012

Kylie Jenner Inspired Make-up


Products used on the eyes:
  • Elf Eyelid Primer
  • Color Workshop ( Navy Blue and cream)
  • BH Cosmetics 120 Pallet 4th edition (Navy Blue, Baby Blue and silver)
  • L.A Color Darling Pallet (Brown)
  • BH Cosmetics Gel Liner in Black
  • JLB Eyeliner pencil in black
  • Santee Mascara
Products used for the face:
  • Hard Candy Sheer Envy Skin Perfecting Primer
  • Rimmel London Stay Matte Foundation
  • True blend Mineral Powder
  • Elf Bronzing Powder
  • A very light pink blush
Brushes Used:
  • Elf Eye-shadow brush
  • Elf blending brush
  • Color Workshop Flat Liner Brush
  • Elf "C" brush
  • Color workshop flat blending brush
  • Color workshop Stippling/Blending Brush
  • Elf Contour brush
Lips:
  • BH Cosmetics Lip gloss in Studious
Get The Look:
  • Apply your face primer before you start to apply your eye-shadow primer that way it would have sunken into your skin and your will be ready for you to apply your foundation. 
  • Apply an eyeshadow primer or if you don't have one apply a concealer and go over it with a bit of powder.
  • Now taking your eye-shadow brush place the navy blue color on your lid. Pat the color on your eye, this will help make the color a bit more intense.
  • Now taking a crease brush begin to blend a matte brown eye-shadow in your crease.
  • Taking a flat brush place a silver color on the outer corner and wing it out.
  • Using the same brush place that silver on the lower lid on the outer part and take it half way. Then either with a baby blue eyeliner or eye-shadow place it on the inner corner to the silver.
  • Using a different brush take a color close to you skin color and being to highlight under your brow. You can also place the color at the inner corner near your tear ducts to catch light, this step of course is optional.
  • Now begin to line your eyes with a black eyeliner and then add some mascara. You can add fake lashes if you want for extra drama.
  • Using a stippling brush apply your foundation to your face.Blend it in and remember to put some on your neck.
  • Next apply a powder to set in your foundation. For this I used the stippling brush.Taking a contour brush and elf bronzing powder begin to contour your face, place it at the hollows of your cheek, temples, both sides of your nose (optional) and along your jaw line. This of course if optional and it will make your face appear slimmer.
  • Now using your blush brush begin to apply a blush to the apple of your cheeks. 
  • Apply a lip gloss.
Tutorial: http://www.youtube.com/watch?v=Bt1aO2miODE&feature=channel&list=UL

Adele's Grammy's Inspired Look

This year at the Grammy's Adele look absolutely stunning. Her make-up was beautiful and very classy.


Products used for the eyes:

  • Elf eyelid primer
  • NYX Jumbo Eye Pencil inMilk
  • BH Cosmetics 88 Pallet (white, dark brown, and black)
  • Color Workshop Pallet (Cream)
  • JLB eyeliner in Black
  • Color Workshop Mascara
Products used for the face:
  • Hard Candy Sheer Envy Skin Perfecting Primer
  • Rimmel London Stay Matte Foundation
  • True blend Mineral Powder
  • Elf Bronzing Powder
  • A very light pink blush
Brushes Used:
  • Elf Eye-shadow brush 
  • Elf "C" eye-shadow brush
  • Color Workshop blending brush
  • Color Workshop Angled Eye-shadow brush
  • Color workshop Stippling/Blending Brush
  • Elf Contour brush
  • Color workshop blush brush
Get the look:
  • Apply your face primer before you start to apply your eye-shadow primer that way it would have sunken into your skin and your will be ready for you to apply your foundation.
  • Apply an eye-shadow primer or if you don't have one apply a concealer and go over it with a bit of powder.
  • Now taking your eye-shadow brush place a white eye-shadow color and place it on your lid.
  • Next  using the blending brush a dark brown  add it to the outer corner rounding it out in a "C"shape and blend into crease.
  • Still using the blending brush apply black to the outer corner and blend slightly into the crease.
  • Add a highlight under you brow.
  • Line your eyes with black eyeliner.
  • Curl your lashes and add mascara. Add false lashes if you desire to.
  • Using a stippling brush apply your foundation to your face.Blend it in and remember to put some on your neck.
  • Next apply a powder to set in your foundation. For this I used a mini kabuki brush.
  • Taking a contour brush and elf bronzing powder begin to contour your face, place it at the hollows of your cheek, temples, both sides of your nose (optional) and along your jaw line. This of course if optional and it will make your face appear slimmer.
  • Now using your blush brush begin to apply a blush to the apple of your cheeks.
  • Apply a pinkie nude lipstick.
Tutorial:  http://www.youtube.com/watch?v=C2XQ71FqEWA&feature=relmfu

Friday, June 15, 2012

Party Girl

Got a party to go to and wanna be the center of attention? Well I will show you how to achieve the perfect party look.

Products used on eyes:
  • NYX Eye-shadow base in skin-tone
  • BH Cosmetics eyeliner in Frost
  • BH Cosmetics 120 4th edition Pallet (Silver)
  • BH Cosmetics 88 Matte Pallet (Maroon)
  • Color Workshop Pallet (Bare)
  • JLB Eyeliner in Black
  • BH Cosmetics Gel eyeliner in Onyx
  • Color Workshop Mascara
Products used for the face:
  • Hard Candy Sheer Envy Skin Perfecting Primer
  • Elf Tinted Moisturizer
  • True blend Mineral Powder
  • Color Workshop ( Bronzer and pink blush)
Products used on lips:
  • BH Cosmetics Lip gloss in Studious
Brushes Used:
  • Elf Eye-shadow brush
  • Color Workshop flat blending brush
  • Elf blending brush
  • Color workshop flat blending brush
  • Color workshop Stippling/Blending Brush
  • Elf Contour brush
  • Color workshop blush brush
Get The Look:
  • Apply your face primer before you start to apply your eye-shadow primer that way it would have sunken into your skin and your will be ready for you to apply your foundation. 
  • Apply an eyeshadow primer or if you don't have one apply a concealer and go over it with a bit of powder.
  • Begin by placing a silver eyeliner on your lid and blending it over your lid, this will help make the color pop more than a primer will do on its own.
  • Now taking your eye-shadow brush place a silver eye-shadow on your lid.
  • Using your flat blending brush place a maroon eye-shadow at the outer corner and blend into crease.
  • Using a different brush take a color close to you skin color and being to highlight under your brow . You can lso place the color at the inner corner near your tear ducts to catch light, this step of course is optional.
  • Now begin to line your eyes with a black eyeliner and then add some mascara. You can add fake lashes if you want for extra drama.
  • Using a stippling brush apply your foundation to your face.Blend it in and remember to put some on your neck
  • Next apply a powder to set in your foundation. For this I used the stippling brush.
  • Taking a contour brush and elf bronzing powder begin to contour your face, place it at the hollows of your cheek, temples, both sides of your nose (optional) and along your jaw line. This of course if optional and it will make your face appear slimmer.
  • Now using your blush brush begin to apply a pink blush to the apple of your cheeks. 
  • Apply alight pink lipstick or gloss.
Tutorial: http://www.youtube.com/watch?v=9lPjgAHdJB4&feature=channel&list=UL