Tuesday, May 7, 2013

LA Color Jumbo Pencil Review

  I'm a huge fan LA Colors fan they are my absolutely favorite drugstore brand! Recently they have released their new jumbo eyeliner pencils. I was at family dollar and saw they had a white one so I decided to buy it.


Here's what LA Colors has to say about this product:

LONG LASTING
VIBRANT SHADES
SMOOTH APPLICATION

Skip the traditional powder eyeshadow and try a jumbo eyeshadow pencil. It allows you to use as an eyeliner for bold lines or blend out for a subtle effect. Display comes complete with dual sharpener for easy sharpening.
 
 NYX's Jumbo Pencil on the left and LA Color on the right.

Left:No Base Middle: LA Color Right: NYX


  The pencil s bought is called Sea Shell and is very similar to the NYX Jumbo Pencil in Milk. It's very creamy and blends out like butter. It blends to a pale white but still makes your shadows pop. It's a bit smaller than NYX's, it's 13 oz compared to 18 oz.

This is a great dupe for the NYX's Jumbo eye pencils especially if you are nowhere near an ulta or don't have time to order online. These are also cruelty free. The colors they come in are: white, grey, black, green, baby blue, blue, and purple. However, they have way more colors on their website.They cost $1.50. I absolutely love this pencil and will definitely try more. These are absolutely amazing and are worth the try, you can find these pencils at any dollar general or family dollar.

Monday, April 29, 2013

Sea and Sand: A Makeup Tutorial


I hope you enjoy this fun spring/summer look. :)


Products used on the eyes:
  • Wet n Wild Take On The Day Eyeshadow Primer
  • L.A Colors Jumbo Pencil in Sea Shells
  • BH Cosmetics 120 4th edition palette: Bronze, Darker Bronze, Brown, & Blue
  • Santee: White
  • Wet n Wild eyeliner pencil in white
  • BH Cosmetics Liquid Eyeliner Pen
  • Milani 12 hour Shadow Eyez in Aquatic Style
  • Rimmel London Sexy Curves Mascara
Products used for the face:
  • Hard Candy Perfecting Primer
  • Elf Tinted Moisturizer in Sand
  • Rimmel London Hide the Blemish Concealer in 001Ivory
  • Cover Girl Professional Translucent Powder in 115 Translucent Medium
  • Color Workshop Palette (Bronzer and peach blush)
  • Maybelline Loose Powder in 01 Light (Highlight)
Products Used for the lips:
  • Sugar Rose Lip Treatment
  • The Color Workshop Lip Liner in Pink
  • Milani Color Perfection Lipstick in Tiki-Tiki-Pink
Brushes Used:
  • Color Workshop Eyeshadow Brush
  • Color Workshop Angled Shadow Brush
  • SOHO Blending Brush
  • Elf Stippling/Blending Brush
  • Color Workshop Contour brush
  • Color workshop blush brush
Get The Look:
  • Apply your face primer before you start to apply your eye-shadow primer that way it would have sunken into your skin and your will be ready for you to apply your foundation. 
  • Apply an eyeshadow primer or if you don't have one apply a concealer and go over it with a bit of powder.
  • Apply a white base if you want the colors to pop more. I used L.A Jumbo Pencil in Sea Shells.
  • Using an eyeshadow brush I applied a bronze color over the entire lid, next I applied a darker bronze color over the color we just applied.
  • I used a fluffy blending brush and blended some brown in the outer corner going into the crease.
  • I also applied the a blue eyeliner under my lower lash line and went over it with a blue eyeshadow..
  • Now apply a highlight under the brows, I just used a white eyeshadow.
  • Now begin to line your eyes I tightlined with a black eyeliner, added a white eyeliner to my waterline, lined the top lid with a liquid eyeliner pen and then add some mascara. 
  • Using a stippling brush apply your foundation to your face.Blend it in and remember to put some on your neck. Next apply a powder to set in your foundation. For this I used the stippling brush.
  • Taking a contour brush and bronzing powder begin to contour your face, place it at the hollows of your cheek, temples, both sides of your nose (optional) and along your jaw line. This of course if optional and it will make your face appear slimmer.
  • Now using your blush brush begin to apply a peach blush to the apples of your cheeks. 
  • Before I did my makeup I applied a lip balm. Then I lined my lips with a pink lip liner and applied a pink lipstick.
Tutorial

Thursday, April 25, 2013

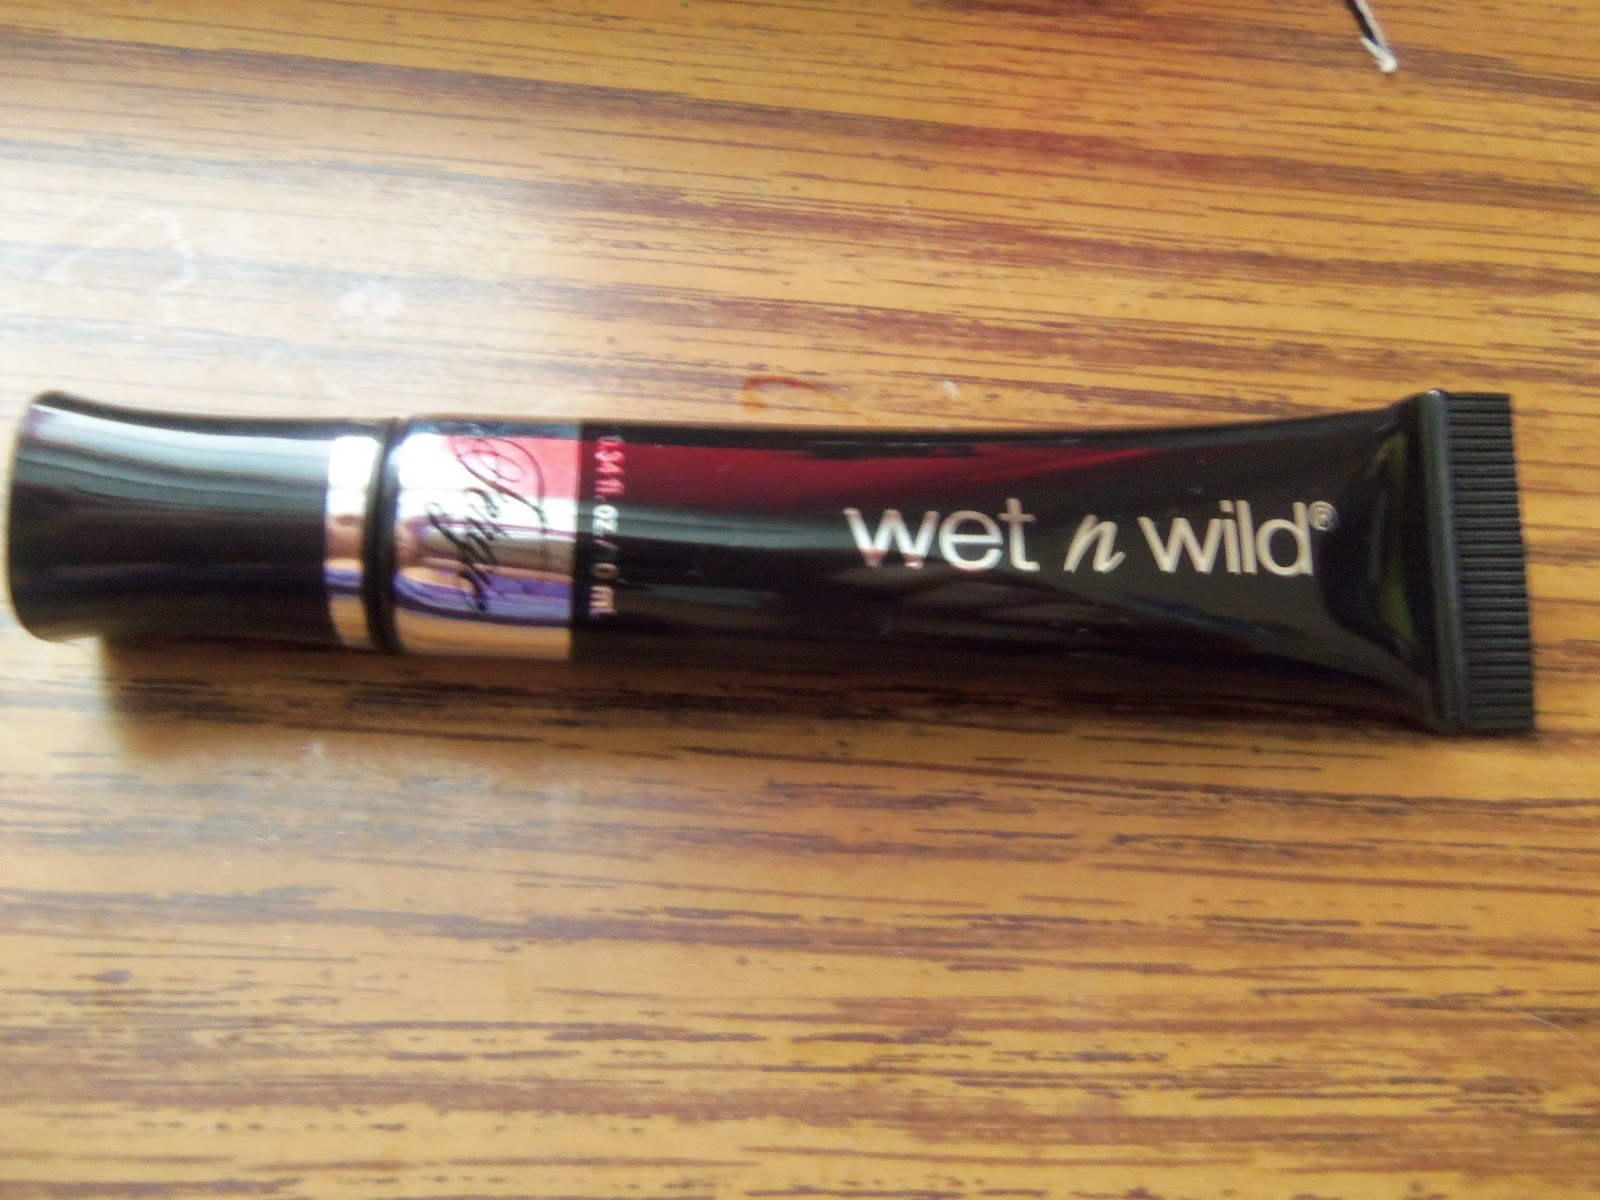
Wet N Wild Take On The Day Eyeshadow Primer

So recently Wet n Wild came out with a Fergie makeup collection. Not only are these makeup items the hottest thing to hit the market but also the collection features the first ever drugstore eye primer, Take On The Day Eyeshadow Primer, that is comparable to high end eyeshadow primers. This primer is an amazing dupe for Urban Decay's Primer Potion.


This is what Wet n Wild has to say about the primer:

In keeping with Fergie’s mission of bringing prestige to the masses, the eye primer is a key 

product. This perfect primer turns prestige formulations to everyday wear. Amazing formula 

preps and brightens eyelids for shadow application in an all-day formula. Glides effortlessly 

onto the skin providing the ultimate eye prep for smoother, more vibrant shadow and all-day, 

creaseless wear.
 

             The first pic shows what the primer looks like out of the tube, the 2nd is when you blend it out, and the third shows how pigmented a shadow looks on top.

Now let's compare the Primer Potion to this primer. The potion primer is 11 mL and cost $19, this primer is 10 mL and cost $4.99. A big difference in price, right? Anyway, the formula is particularly the same, they dry to a clear finish and keep shadows looking vibrant, however, in my opinion this primer does a better job of making them pop. Also, they both do keep shadows in place for hours! The tube size is almost exactly the same as the Two Faced Shadow Insurance. and all you need is a little bit of product to do the job. Obviously, Wet n Wild is going to give Urban Decay a run for their money with this amazing primer.

As a girl who has oily lids and living in South Texas, I definitely need a primer that is going to do it's job. I will admit when I bought it I was a bit skeptical about it, but after trying it out it has definitely turned out to be   a favorite. It kept my shadows in place and throughout the day the colors remained vibrant.

If you're low on cash and are in need of a primer, this is the one for you! You can find them at any Walgreens or CVS. This is definitely going to be an item I re-purchase in the future. I hope Wet n WIld keeps this product around for a very long time. If you guys used this what are your thoughts on it? I would love to hear your opinions on it. Thank you guys for reading and have a beautiful day!

Monday, April 22, 2013

Neutral Prom Makeup


Hello my beauties I hope you guys enjoy this neutral prom look. Also I have decided to upload a pic of the shadows I used and numbered them in the order I used them. I hope you guys like this new setup I'm trying let me know if it's easier to follow in the comments down below. :)


Products used on the eyes:
  • Urban Decay Potion Primer
  • Sephora Limited Edition Palette: Black Gel Liner, Silver And all these eyeshadows that are numbered
  • Wet n Wild eyeliner pencil
  • Rimmel London Sexy Curves Mascara
Products used for the face:
  • Hard Candy Perfecting Primer
  • Elf Tinted Moisturizer in Sand
  • Rimmel London Hide the Blemish Concealer in 001Ivory
  • Cover Girl Professional Translucent Powder in 115 Translucent Medium
  • Color Workshop Palette (Bronzer and pink blush)
  • Maybelline Loose Powder in 01 Light (Highlight)
Products Used for the lips:
  • Sugar Rose Lip Treatment
  • The Color Workshop Lip Liner in Red
  • Jordana Matte Lipstick in Red
Brushes Used:
  • Color Workshop Eyeshadow Brush
  • Elf crease brush
  • SOHO Blending Brush
  • Elf Stippling/Blending Brush
  • Color Workshop Contour brush
  • Color workshop blush brush
Get The Look:
  • Apply your face primer before you start to apply your eye-shadow primer that way it would have sunken into your skin and your will be ready for you to apply your foundation. 
  • Apply an eyeshadow primer or if you don't have one apply a concealer and go over it with a bit of powder.
  • Using an eyeshadow brush I applied 1 all over the lid and in the outer corner I mixed both of the 2s together one has gold flecks.
  • Using a crease brush I applied 3. Then I used a fluffy brush to blend all the colors together.
  • I also applied the dark blue shadow under the lower lashline.
  • Now apply a highlight under the brows. I used 4. I also applied a silver glitter eyeshadow in inner corner and blended into the lid color.
  • Now begin to line your eyes with a black eyeliner, and then add some mascara. 
  • Using a stippling brush apply your foundation to your face.Blend it in and remember to put some on your neck. Next apply a powder to set in your foundation. For this I used the stippling brush.
  • Taking a contour brush and bronzing powder begin to contour your face, place it at the hollows of your cheek, temples, both sides of your nose (optional) and along your jaw line. This of course if optional and it will make your face appear slimmer.
  • Now using your blush brush begin to apply a pink blush to the apples of your cheeks. 
  • Before I did my makeup I applied a lip balm. Then I lined my lips with a red lip liner and applied a matte red lipstick.
Tutorial

Thursday, April 18, 2013

Milani Color Statement Lipstick


Almost every Beauty Vlogger and Blogger has been talking about the new Milani Color Statement Lipsticks. After hearing nothing but good things I decided to try them out myself. I had originally went to HEB since they carry Milani products but that have not yet received the new shipment so I ended up getting mine from walmart.

They were almost out of every shade! So with the limited choices I decided to get Hot Pink Rage since I absolutely love hot pinks lipstick. Also it has a matte finish and is the only pink in this collection that dries to this finish. The lipstick cost $4.49 which is a dollar cheaper than most places.


This is what Milani says about these lipsticks:

Make a statement without saying a word!  True Instant Color. One stroke, full coverage application. This next generation lipstick gives the ultimate in color, texture and finish. The lightweight creamy formula contains Vitamins A, C, & E to moisturize and nourish lips. Paraben-free. Available in Vinyl, Metallic, Cream, Shimmer, Pearl & Matte finish.


This color you can expect great pigmentation in just one swipe! 


Since the lipstick has a matte finish it does unfortunately dry out your lips. It feels kind of uncomfortable but not so much to where it bothers me. As it fades the color will settle into your lines and it looks horrible. I would not recommend this lipstick if your lips are dry. You do need to exfoliate your lip to allow this product to glide on smoothly and look perfect.  

The staying power in my opinion is okay it lasts at most with me 4-6 hours. I usually do line my lips with a lip liner before applying this lipstick. And once it has faded it'll leave a stain on your lips which I like since there is still a bit of color on my lips. 

I am absolutely going to try different shades. If you bought a color statement lipstick I would like to know what color you have? How do you feel about the lipstick? Let me know in the comments below. Have a wonderful day! :)


Wednesday, April 17, 2013

Katherine & Elizabeth: Welcome to the Fashion World


Have you ever heard about Katherine and Elizabeth? Katherine and Elizabeth is a new online fashion store! Now, before I talk about the amazing items they sell, allow me to give you some insight on how this website came to be as well as some information on the owners.

Katherine and Elizabeth are more than just owners and business partners, they are also sisters!  They were always meant to have a business of their own as kids they tried all kinds of money making schemes, but a trip to New York, specifically Fifth Avenue, set them to act on their dream to have a business of their own and becoming part of the fashion world.

Now let’s talk about their website and the items they sell. First off as soon as you’re on the homepage you get an instant coupon for free shipping. Who doesn't love that? Also if you enter your email in a little pop up box you get $15 off your purchase. The website is very simple and easy to navigate. You find what you need fast! The main tabs are on the top and the others are below. As an online shopper I believe easy navigation is key! I absolutely love their site.

Now let’s talk about the exciting part of this post, the clothes!!! I absolutely fell in love with almost everything I saw. The clothes are super trendy, sexy, chic, classy and very high fashion. I'm very picky when it comes to clothes so if I love them I know every girl will love them. There are different styles, so there is something that everyone will like and also the size of the items range. At the moment they sell dresses, tops, and bottoms: shorts, pants and skirts. Also during the month of April if you use the code: 10APRIL, you get 10% off your order. Now I will give you guys a preview of items they sell and just a little fyi these are some of my favorites from the site.


I hope you guys like what you see if so, be sure to check out their website: http://katherineandelizabeth.com.au/ and follow their social media websites: Facebook, Tumblr, Twitter and Instagram.  Be sure to tell them Victoria sent you. As always have a fabulous day.
Xoxo Victoria


*Disclosure: I was asked by Katherine to write a post for their store and I'm getting compensated for it as well. However, that does not affect my view on their store or items, these are my honest thoughts.

Sunday, April 14, 2013

"Heart Attack" Demi Lovato Inspired


Over the weekend I finally got to see Demi Lovato's new music video for "Heart Attack"! I love this song and the makeup she was rocking in the video, well the dramatic makeup, so I decided to recreate this and I hope you enjoy.

Products used on the eyes:
  • ELF Eyelid Primer 
  • Sephora Palette : Black, Brown & Beige
  • BH Cosmetics 120 4th edition palette: Shimmer Black, Shimmer Navy Blue
  • Wet n Wild Black eyeliner pencil
  • L.A Colors Liquid Eyeliner Pen in Black
  • Kiss False Lashes in 05
  • Rimmel London Sexy Curves Mascara
Products used for the face:
  • NYC Foundation in 681 Deep Beige
  • Rimmel London Hide the Blemish Concealer in 001Ivory
  • Cover Girl Professional Translucent Powder in 115 Translucent Medium
  • Color Workshop Palette (Bronzer and peach blush)
  • Maybelline Loose Powder in 01 Light (Highlight)
Products Used for the lips:
  • Wet n Wild Bare It All (Nude)
  • NYC Lipgloss in Nude York City
Brushes Used:
  • Color Workshop Eyeshadow Brush
  • Sephora Lash Curler
  • SOHO Blending Brush
  • Elf Stippling/Blending Brush
  • Color Workshop Contour brush
  • Color workshop blush brush
Get The Look:
  • Apply your face primer before you start to apply your eye-shadow primer that way it would have sunken into your skin and your will be ready for you to apply your foundation. 
  • Apply an eyeshadow primer or if you don't have one apply a concealer and go over it with a bit of powder.
  • I applied a black base all over my lid.
  • Using an eyeshadow brush I applied a shimmer black over the base and then applied a matte black over the shimmer black.
  • Blend out the black and then apply a light brown color in the crease to blend out the harsh line from the black.
  • I also applied the shimmer navy blue shadow under the lower lashline.
  • Now apply a highlight under the brows. I used an beige eyeshadow. I also applied some in the inner corner.
  • Now begin to line your eyes with a black eyeliner, add dramatic lashes, I used Kiss lashes in 05, and then add some mascara. 
  • Using a stippling brush apply your foundation to your face.Blend it in and remember to put some on your neck. Next apply a powder to set in your foundation. For this I used the stippling brush.
  • Taking a contour brush and elf bronzing powder begin to contour your face, place it at the hollows of your cheek, temples, both sides of your nose (optional) and along your jaw line. This of course if optional and it will make your face appear slimmer.
  • Now using your blush brush begin to apply a peach blush to the apples of your cheeks. 
  • For the lips I applied a nude lipstick and went over it with a nude lipgloss.
Click Here For The Tutorial

Friday, April 12, 2013

Profusion Neutral Palette

Have you ever heard of Profusion? Not many people have. I've seen a couple of their products at random stores, I finally decided to pick one up from Big Lots.
 
The one I got, I only bought it because the top was covered in pink glitter and had a little bow on it, who could resist that? And did I mention it was only a dollar!?! I thought the shadows were gonna be really cheapy but they are the complete opposite. 


The palette comes with 10 colors, they range from warm and cool tone neutrals. The shadows do have shimmer in them.
These colors are super pigmented and a little does go a long way. They blend out really smooth like butter. As you can tell in the picture they look as amazing without a base as they do with a base, however, if you do use a base they pop more. 

I absolutely love this palette! I would imagine it to be better than The Urban Decay Naked Palettes, I never used those so I can't really say they are. These are absolutely high quality shadows for a very cheap drugstore price. If you happen to see this brand you should definitely try out their products. And always remember ladies just because it's cheap doesn't mean it's not a great product.

Wednesday, April 10, 2013

Colorful Spring Makeup


Hello my beauties, so this look is part of a collab with TheBeautyJunkie. I know I've been posting up nothing but makeup looks but I have some reviews coming up and I even decided to post pictures of things I bought recently. :) So without further to do let's get started!

Products used on the eyes:
  • Urban Decay Primer Potion
  • NYX Jumbo Pencil in Milk
  • BH Cosmetics 120 4th Edition Palette (Yellow, Orange,Hot Pink, Purple and Light Purple)
  • BH Cosmetics 88 Matte Palette (Orange, Hot Pink, Purple, Light Purple, Beige, and Green
  • NYX Singel Eyeshadow in Mellow Yellow
  • NYX Slim Eyeliner Pencil in Purple
  • Hot Topic Glitter eyeliner pencil in Black
  • BH Cosmetics Liquid Eyeliner Pen
  • Rimmel London Sexy Curves Mascara
Products used for the face:
  • Hard Candy Perfecting Primer
  • Elf Tinted Moisturizer in Sand
  • Rimmel London Hide the Blemish Concealer in 001Ivory
  • Cover Girl Professional Translucent Powder in 115 Translucent Medium
  • Color Workshop Palette (Bronzer and peach blush)
  • Maybelline Loose Powder in 01 Light (Highlight)
Products Used for the lips:
  • The Color Workshop
  • Elf Makeup Set
  • Milani Color Statement Lipstick in Hot Pink Rage
Brushes Used:
  • Elf Eyeshadow Brush
  • Elf crease brush
  • SOHO Blending Brush
  • Elf Stippling/Blending Brush
  • Color Workshop Contour brush
  • Color workshop blush brush
Get The Look:
  • Apply your face primer before you start to apply your eye-shadow primer that way it would have sunken into your skin and your will be ready for you to apply your foundation. 
  • Apply an eyeshadow primer or if you don't have one apply a concealer and go over it with a bit of powder.
  • I applied a white base all over my lid..
  • So to start off with the eyeshadow I applied shimmery eyshadows first, I really want the eyes to look intense, so with that being said. Using an eyeshadow brush I applied a shimmer yellow from the inner corner to 1/3 on the lid, and in the middle I applied an orange shimmer shadow and finally in the last 1/3 of lid I applied a hot pink. Try to make it not go past the crease.
  • Using a purple eyeliner outline above your crease for a cut crease.Then using a crease brush blend out the line with shimmery purple eyeshadow. Then blend the harshness of the line I blended out the top with a light purple.
  • Using my SOHO Blending Brush I blended all the colors for a seamless transtion.
  • Now just going over the colors for a matte finish. I used mellow yellow and went over the yellow, and the rest of the colors I just went over them with an orange, hot pink, purple and light purple.
  • I then applied the lid colors under my lower lash line.
  • Now apply a highlight under the brows. I used a beige eyeshadow. I also applied a green eyeshadow in the inner corner and blended into the yellow.
  • Now begin to line your eyes with a black eyeliner, and then add some mascara. 
  • Using a stippling brush apply your foundation to your face.Blend it in and remember to put some on your neck. Next apply a powder to set in your foundation. For this I used the stippling brush.
  • Taking a contour brush and elf bronzing powder begin to contour your face, place it at the hollows of your cheek, temples, both sides of your nose (optional) and along your jawline. This of course if optional and it will make your face appear slimmer.
  • Now using your blush brush begin to apply a peach blush to the apples of your cheeks. 
  • For the lips I used filled in my lips with a pink lip liner and used a lip brush to apply a hot pink matte lipstick.
Click Here For Tutorial

Saturday, April 6, 2013

Prom: Blue Smokey Eye


Hello loves I'm back with a blue smokey eye for Prom this was requested and is part of my collab with a fellow youtuber. I hope you enjoy it and I'll post a neutral look for prom later on.

Products used on the eyes:
  • Elf Eyelid Primer
  • Wet n Wild White Eyeliner Pencil
  • The Color Workshop Palette:  Whisper, Summer, Sky Blue, Deep Sea, Ice, & Mustard
  • Hot Topic Black Glitter eyeliner pencil
  • Elf Liquid Glitter eyeliner in Stardust
  • Rimmel London Sexy Curves Mascara
Products used for the face:
  • Elf Tinted Moisturizer in Sand
  • Rimmel London Hide the Blemish Concealer in 001Ivory
  • Cover Girl Professional Translucent Powder in 115 Translucent Medium
  • Color Workshop Palette (Bronzer and peach blush)
  • Maybelline Loose Powder in 01 Light (Highlight)
Products Used for the lips:
  • Wet n Wild Lipstick in "Bare It All"
  • NYC Lipgloss in Nude York City
Brushes Used:
  • Color Workshop Eyeshadow Brush
  • Elf crease brush
  • SOHO Blending Brush
  • Elf Stippling/Blending Brush
  • Color Workshop Contour brush
  • Color workshop blush brush
Get The Look:
  • Apply your face primer before you start to apply your eye-shadow primer that way it would have sunken into your skin and your will be ready for you to apply your foundation. 
  • Apply an eyeshadow primer or if you don't have one apply a concealer and go over it with a bit of powder.
  • I applied a white base all over my lid.
  • Using an eyeshadow brush I applied a baby blue (Whisper) over the base and in the outer corner I applied a blue (Summer) mixed with the sky blue eyeshadow and blended it into the crease.
  • Using a crease brush I applied a dark blue (Deep Sea) shadow right into the mixture of sky blue and blue colors.. Then I used a fluffy brush to blend all the colors together.
  • I also applied the dark blue shadow under the lower lashline.
  • Now apply a highlight under the brows. I used a beige (Mustard) eyeshadow. I also applied a white (Ice) eyeshadow in inner corner and blended into the dark blue.
  • Now begin to line your eyes with a black eyeliner, and then add some mascara. I went over the lid eyeliner with some glitter.
  • Using a stippling brush apply your foundation to your face.Blend it in and remember to put some on your neck. Next apply a powder to set in your foundation. For this I used the stippling brush.
  • Taking a contour brush and elf bronzing powder begin to contour your face, place it at the hollows of your cheek, temples, both sides of your nose (optional) and along your jaw line. This of course if optional and it will make your face appear slimmer.
  • Now using your blush brush begin to apply a peach blush to the apples of your cheeks. 
  • For the lips I applied a nude lipstick and went over it with a nude lipgloss.
Click here for the tutorial

Thursday, April 4, 2013

Dramatic/Rocker Chick Inspired


Sorry for not uploading anything recently I've been out of town but I'm back :) I hope you guys had a wonderful Easter.


Products used on the eyes:
  • NYX Eyeshadow Base in Skin tone 
  • BH Cosmetics 120 4th edition palette: Midnight Blue, Bronze,Pink, Light Pink, & Beige
  • Wet n Wild Black eyeliner pencil
  • BH Cosmetics Liquid Eyeliner Pen in Black
  • Rimmel London Sexy Curves Mascara
Products used for the face:
  • Elf Tinted Moisturizer in Sand
  • Rimmel London Hide the Blemish Concealer in 001Ivory
  • Cover Girl Professional Translucent Powder in 115 Translucent Medium
  • Color Workshop Palette (Bronzer and peach blush)
  • Maybelline Loose Powder in 01 Light (Highlight)
Products Used for the lips:
  • The Color Workshop Lip Liner in Red
  • NYC Lipstick in Sheer Red
Brushes Used:
  • Color Workshop Eyeshadow Brush
  • Elf crease brush
  • SOHO Blending Brush
  • Elf Stippling/Blending Brush
  • Color Workshop Contour brush
  • Color workshop blush brush
Get The Look:
  • Apply your face primer before you start to apply your eye-shadow primer that way it would have sunken into your skin and your will be ready for you to apply your foundation. 
  • Apply an eyeshadow primer or if you don't have one apply a concealer and go over it with a bit of powder.
  • I applied a black base all over my lid.
  • Using an eyeshadow brush I applied a midnight blue over the base.
  • Using a crease brush I applied a pink shadow right above the midnight blue and above the pink I applied a light shimmer pink. Then I used a fluffy brush to blend all the colors together.
  • I then took the eyeshadow brush again and applied a bronze shadow in the center and blended it out a fluffy brush.
  • I also applied the midnight blue shadow under the lower lashline.
  • Now apply a highlight under the brows. I used a shimmer beige eyeshadow. I also applied some in the inner corner and blended into the bronze.
  • Now begin to line your eyes with a black eyeliner, and then add some mascara. 
  • Using a stippling brush apply your foundation to your face.Blend it in and remember to put some on your neck. Next apply a powder to set in your foundation. For this I used the stippling brush.
  • Taking a contour brush and elf bronzing powder begin to contour your face, place it at the hollows of your cheek, temples, both sides of your nose (optional) and along your jaw line. This of course if optional and it will make your face appear slimmer.
  • Now using your blush brush begin to apply a peach blush to the apples of your cheeks. 
  • For the lips I lined them with a red lip liner and then applied a red lipstick.
Click Here To watch the tutorial

Tuesday, March 26, 2013

Spring Sunset


I know it's been a while since I've uploaded anything but I'm back with an awesome look I did over the weekend using the new products I've gotten recently. I hope you enjoy this look as much as I do! :)


Products used on the eyes:
  • Too Faced Eyeshadow Insurance
  • NYX Jumbo Pencil in Milk
  • 8 Bit Cosmetics: Armature, The Cat, & Smashing Pots
  • Elf Quad "Drama": White
  • Essemce Eyeline Pencil in Scream Green
  • NYX Slim Eyeliner Pencil in Purple
  • Wet n Wild Black eyeliner pencil
  • L.A Colors Liquid Eyeliner
  • Too Faced Lashgasm Mascara
Products used for the face:
  • Rimmel London Clean Finish Poreless Foundation in 340 Nude
  • Rimmel London Hide the Blemish Concealer in 001Ivory
  • Cover Girl Professional Translucent Powder in 115 Translucent Medium
  • Color Workshop Palette (Bronzer and mixed peach & pink blush)
  • Maybelline Loose Powder in 01 Light (Highlight)
Products Used for the lips:
  • Milani Color Statement Lipstick in Hot Pink Rage
Brushes Used:
  • Color Workshop Eyeshadow Brush
  • Elf crease brush
  • SOHO Blending Brush
  • Elf Stippling/Blending Brush
  • Color Workshop Contour brush
  • Color workshop blush brush
Get The Look:
  • Apply your face primer before you start to apply your eye-shadow primer that way it would have sunken into your skin and your will be ready for you to apply your foundation. 
  • Apply an eyeshadow primer or if you don't have one apply a concealer and go over it with a bit of powder.
  • I applied a white base all over my lid..
  • Using an eyeshadow brush I applied Armature, a bronze eyeshadow, on the lid. Try to make it not go past the crease.
  • Using a purple eyeliner outline above your crease for a cut crease.Then using a crease brush blend out the line with purple eyeshadow, I used The Cat. Then blend the bronze and purple eyeshadows together using a fluffy brush.
  • I then applied a green eyeliner under my lower lashline and extended out past my eye. I went over it with Smashing Pots, green glitter, and blended it out with a crease brush.
  • Now apply a highlight under the brows. I used a white eyeshadow. I also applied some in the inner corner and blended into the bronze.
  • Now begin to line your eyes with a black eyeliner, and then add some mascara. 
  • Using a stippling brush apply your foundation to your face.Blend it in and remember to put some on your neck. Next apply a powder to set in your foundation. For this I used the stippling brush.
  • Taking a contour brush and elf bronzing powder begin to contour your face, place it at the hollows of your cheek, temples, both sides of your nose (optional) and along your jaw line. This of course if optional and it will make your face appear slimmer.
  • Now using your blush brush begin to apply a mixture of pink and a peach blush to the apples of your cheeks. 
  • For the lips I used a matte hot pink lipstick.
Click here to watch the tutorial 

Wednesday, March 20, 2013

Neutral Birthday Makeup


Hello everyone, I wore this for my birthday, it is super toned down and perfect if your going out to lunch or dinner. I hope you enjoy this look.


Products used on the eyes:
  • Too Faced Eye Insurance
  • Profusion (Off White, Dark Brown, and Burgandy)
  • The Color Workshop (Earth Tone and Cobbler)
  • Elf Liquid Eyeliner Pen in Black
  • Hot Topic Glitter Eyeliner Pencil in Black 
  • Too Faced Lashgasm Mascara
Products used for the face:
  • Elf Tinted Moisturizer
  • Covergirl Loose Face Powder
  • Rimmel London Concealer
  • Color Workshop Palette (Pink Blush snd Bronzer)
  • Maybelline Loose Powder in Light (Highlight)
Products Used for the lips:
  • Too Faced LipInsurance
  • Milani Color Statement Lipstick in Hot Pink Rage
Brushes Used:
  • Elf Eyeshadow Brush
  • Elf crease brush
  • SOHO Blending Brush
  • SOHO Liner Brush
  • Elf Stippling/Blending Brush
  • Color Workshop Contour brush
  • Color workshop blush brush
Get The Look:
  • Apply your face primer before you start to apply your eye-shadow primer that way it would have sunken into your skin and your will be ready for you to apply your foundation. 
  • Apply an eyeshadow primer or if you don't have one apply a concealer and go over it with a bit of powder.
  • Using an eyeshadow brush I applied an off white shimmer or matte eyeshadow on the lid, take it a little above the crease.
  • Now apply a light brown in the outer corner going into the crease using a crease brush. Then apply a dark brown color in the outer corner blending into the light brown. Take it about half way and make sure not to get these colors on the lid.
  • Taking a small angled or liner brush I applied some of the burgundy eyeshadow under my lower lash line.
  • Blend the colors for a seamless transition.
  • Now apply a highlight under the brows. The one I used is a beige color. I also applied some in the inner corner and blended into the lid color.
  • Now begin to line your eyes. This look is perfect with winged out liner, and since I pretty much suck at that, I took a dark brown eyeshadow and began to map out how I want my liner to look, and then I just traced over it with black eyeliner. 
  • For the waterline I applied a black liner.
  • Apply mascara and falsies if you desire.
  • Apply your face makeup. 
  • Taking a contour brush and bronzing powder begin to contour your face, place it at the hollows of your cheek, temples, both sides of your nose (optional) and along your jaw line. This of course if optional and it will make your face appear slimmer.
  • Now using your blush brush begin to apply a pink blush to the apple of your cheeks. 
  • For the lips I applied a lip primer, let it dry and went over it with a matte hot pink lipstick.
Click here for tutorial

Saturday, March 16, 2013

Easter/Spring Inspired


I hope you guys enjoy this spring/Easter inspired look using pastel colors. This is part of a collab with MissAbbeyTorres.

Products used on the eyes:
  • Urban Decay Primer Potion
  • NYX Jumbo Pencil in Milk
  • BH Cosmetics 88 Matte Palette: Yellow, light Green, Light Pink, Baby Blue, Light Pink& Highlight (Think Pastel Colors)
  • Wet n' Wild Eyeliner Pencil in Black
  • Elf Liquid Liner Pen in Black
  • Color Workshop Mascara
Products used for the face:
  • Hard Candy Perfecting Primer
  • Rimmel London Poreless Foundation
  • Cover Girl Translucent Powder
  • Color Workshop (Bronze Powder & Pink Blush)
Products Used for the lips:
  • Too Faced Lip Insurance
  • Wet n Wild Bare It All Lipstick
  • BH Cosmetics Lip Gloss in Studious 
Brushes Used:
  • Color workshop Eyeshadow Brush
  • Elf crease brush
  • Elf Stippling/Blending Brush
  • Elf Contour brush
  • Color workshop blush brush
Get The Look:
  • Apply your face primer before you start to apply your eye-shadow primer that way it would have sunken into your skin and your will be ready for you to apply your foundation. 
  • Apply an eyeshadow primer or if you don't have one apply a concealer and go over it with a bit of powder.
  • I applied a white base all over my lid.
  • Using an eyeshadow brush I applied a light yellow eyeshadow 1/4 onto the lid, then I applied a light green color next to the yellow, then a baby blue next to the green and a light pink eyeshadow on the outer 1/4 of the lid and taking it into the crease. I used pastel colors and make sure to blend.
  • Now apply a highlight under the brows and in the inner corner of the eyes.
  • Now begin to line your eyes with a black eyeliner and then add some mascara. .
  • Using a stippling brush apply your foundation to your face.Blend it in and remember to put some on your neck.
  • Next apply a powder to set in your foundation. For this I used the stippling brush.
  • Taking a contour brush and elf bronzing powder begin to contour your face, place it at the hollows of your cheek, temples, both sides of your nose (optional) and along your jaw line. This of course if optional and it will make your face appear slimmer.
  • Now using your blush brush begin to apply a blush to the apple of your cheeks. 
  • I applied a nude lipstick and went over it with a light pink lip gloss.

Tuesday, March 12, 2013

Colorful Birthday Makeup


Hello my beauties, with my birthday being next week (March 20) I'd thought I create a super colorful look for any occasion I really love how the colors compliment each other,

Products used on the eyes:
  • Urban Decay Primer Potion
  • NYX Jumbo Pencil in Milk
  • Milani Eyeshadow Pencil in Aquatic Style
  • SephoraLimited Edition Block Buster Palette (Blue, Sky Blue,Purple, Pink, shimmer Pink, highlight color, green gel liner, silver shimmer, green, black gel liner and black eyeshadow)
  • Wet n Wild Black eyeliner pencil
  • The ColorWorkshop Mascara
Products used for the face:
  • Rimmel London Poreless Foundation
  • Cover Girl Translucent Powder
  • Color Workshop Palette (Bronzer)
  • Sephora Block Buster Pallete (Rosey Pink Blush)
  • Maybelline Loose Powder in Light (Highlight)
Products Used for the lips:
  • The Color Workshop Pink Lip Liner
  • Milani Lipstick in Tiki-Tiki-Pink
  • Elf Lipshine lipgloss on Sugar Cookie
Brushes Used:
  • Color Workshop Eyeshadow Brush
  • Elf crease brush
  • SOHO Blending Brush
  • Elf Stippling/Blending Brush
  • Color Workshop Contour brush
  • Color workshop blush brush
Get The Look:
  • Apply your face primer before you start to apply your eye-shadow primer that way it would have sunken into your skin and your will be ready for you to apply your foundation. 
  • Apply an eyeshadow primer or if you don't have one apply a concealer and go over it with a bit of powder.
  • I applied a blue base all over my lid and a white base above my crease blending it out towards my eyebrows. If you don't have a blue base you can opt for a white base instead.
  • Taking a crease brush I applied a pink eyeshadow into and above my crease. Then I applied a dark purple into the crease to create a cut crease.
  • Using an eyeshadow brush I applied an almost blue eyeshadow, on the lid. Then I applied a sky blue eyeshadow in the center of the lid.
  • Taking the crease brush one more time I applied a light shimmer pink above the pink, don't forget to blend the colors for a seamless transition. 
  • Using a liner brush I applied green under my lower lash line and silver shimmer in the inner corner as a highlight.
  • Now apply a highlight under the brows. The one I used was a bit lighter than my skin tone. I also applied some in the inner corner and blended into the navy blue.
  • Now begin to line your eyes with a black eyeliner, and then add some mascara. 
  • I didn't apply foundation only powder.
  • Taking a contour brush and elf bronzing powder begin to contour your face, place it at the hollows of your cheek, temples, both sides of your nose (optional) and along your jaw line. This of course if optional and it will make your face appear slimmer.
  • Now using your blush brush begin to apply a blush to the apple of your cheeks. 
  • For the lips I just applied a clear lip gloss.

Monday, March 11, 2013

Elf Beauty On The Go Compact


I've been eyeing this compact for a while and I finally got it for Christmas  I know there are like 10 different palettes for this compact. This particular palette came with two different palettes: one for daytime and one for night time. Altogether this is a 26 piece set: 20 eyeshadows, 4 lip glosses, 1 blush and 1 bronzer.

Top: Girl Next Door Bottom: Life of the Party
 

The palette for night time looks,Life of The Party, has bright and dark colors and 2 extremely shimmery eyeshadows that I think are perfect for an inner corner highlight. The other palette, Girl Next Door, contains neutral colors: Browns (both warm and cool tone) peach, gold and white. The eyeshadows in both of these palettes do contain shimmer, however, Girl Next Door has 4 matte eyeshadow and Life of the Party only contains 1. Looking at the eyeshadows they do look very chalky and cheap. The pigmentation does lack on it's own with some colors so be sure to use a base if you want to intensify the color. They are super easy to blend and you can achieve any look you want. If you never used any Elf eyeshadow you won't be disappointed with these I really do like these two palettes. 

The Life of the Party palette comes with a peach blush. It is absolutely my least favorite thing out of everything! When I apply it it looks like I didn't apply anything! I try to build up the color and still nothing. I know it's a peach blush but I have another one from the color workshop and I can just swipe it one once and there's a bit of color, so compared to that blush this elf one sucks! 

My favorite part of this set is the bronzer, it is just absolutely amazing! It's pigmented enough to give you a glowing look without getting out of hand and it's super easy to blend on your face. I just wished it was in the Life of the Party palette rather than the Girl Next Door one, but oh well. 

Top : Peach & Hot Pink Bottom: Red & Dark Red

The lip glosses from the Girl Next Door palette are a peach and hot pink color. The peach lacks in pigmentation when applied to your lips but it does have a bit of color. If you try to build up the color it just ends up looking really messy. The hot pink looks like it does in the pan just not as bold, it has excellent color payoff compared to the peach lip gloss.  The other two lip glosses in the Life of the part palette are a red with a pinkish tone and the other is a dark red. The first one when applied looks similar to the hot pink just a shade darker. The dark red one just looks red when applied but still perfect for a night out. These lip glosses aren't as sticky as most lip glosses are which is good. They don't stay on the lips long maybe for like an hour or less and they do transfer if your drinking or eating.


Overall I do like the idea of this product, you just snap a palette in the compact and go. However, I don't like that it only comes with one compact because the other one is out and sustainable to being damaged. I believe this set was $4 I think it is great for the price, I give it a rating of 7.5 out of 10. 

Thursday, March 7, 2013

St. Patrick/The Carrie Diaries Inspired

I wanted to do a St. Patrick's tutorial. I totally got inspired by The Carrie Diaries. The lady who works for Interview's green eye makeup was totally amazing so this look is kind of based off of her's. Enjoy.

Products used on the eyes:
  • Elf Eyelid Primer
  • Wet n Wild White eyeliner Pencil
  • BH Cosmetics 120 4th edition Palette (Light Green)
  • L.A Color  Artist Eye Palette (Light Green)
  • BH Cosmetics 88 Matte Palette (Dark Blue-Green, Dark Green, Green & Highlight)
  • Wet n' Wild Eyeliner Pencil in Black
  • L.A Color Liquid 
  • Color Workshop Mascara
Products used for the face:
  • Cover Girl Translucent Powder
  • Color Workshop (Bronze Powder & Peach Blush)
Products Used for the lips:
  • Milani Color Perfect Lipstick in Tiki-Tiki-Pink
  • Elf Lip shine Lip gloss in Sugar Cookie
Brushes Used:
  • Color workshopEyeshadow Brush
  • Elf crease brush
  • Elf Stippling/Blending Brush
  • Elf Contour brush
  • Color workshop blush brush
Get The Look:
  • Apply your face primer before you start to apply your eye-shadow primer that way it would have sunken into your skin and your will be ready for you to apply your foundation. 
  • Apply an eyeshadow primer or if you don't have one apply a concealer and go over it with a bit of powder.
  • I applied a white base all over my lid.
  • Using an eyeshadow brush I applied a light green shimmer eyeshadow, think grass green. onto the lid and then went over it with a matte light green eyeshadow. Now what is ever left on the brush apply into the lower lash line.
  • Using a crease brush apply a dark blue-green eyeshadow into the crease and blend it out so it's not so harsh, then go over that color with a dark green eyeshadow. 
  • Now blend a green eyeshadow into the crease colors.Blend all the colors together for a seamless transition.
  • Now apply a highlight under the brows and in the inner corner of the eyes.
  • Now begin to line your eyes with a black eyeliner and then add some mascara. .
  • Using a stippling brush apply your foundation to your face.Blend it in and remember to put some on your neck.
  • Next apply a powder to set in your foundation. For this I used the stippling brush.
  • Taking a contour brush and elf bronzing powder begin to contour your face, place it at the hollows of your cheek, temples, both sides of your nose (optional) and along your jaw line. This of course if optional and it will make your face appear slimmer.
  • Now using your blush brush begin to apply a blush to the apple of your cheeks. 
  • I applied a pink lipstick and went over it with a light pink lip gloss.
Click here to watch tutorial

Tuesday, March 5, 2013

Milani Color Perfection Lipstick 2012


 I know I'm late with posting a review of these lipsticks since now Milani has brand new lipsticks coming out, but better late than never right? Anyway, let me start by saying I've been dying to try one of Milani's lipsticks, I've heard nothing but great things about them and the fact that my favorite youtube guru, Cora of VintageorTacky, used them had me wanting to buy one and I finally did. I got one of the lipsticks from last year's collection. There wasn't many to choose from at my local H-E-B, but I ended up getting Tiki-Tiki-Pink.


The color is absolutely gorgeous and is the perfect pink color that I've been looking for.It's such a girl  a rosey pink, it does contain some shimmer but it's not so overwhelming. Anyway, the packing of the lipstick is a peach tube with gold lettering. I will the admit the color of the tube is what drew my eye to the lipstick in the first place. The lipstick smells so pretty, it definitely won't bother you if you are picky with scents. It's so creamy and smooth and offers full coverage. It also make your lips look and feel so incredibly soft, however as the color starts fading it does feel like it's drying out your lips. 
The staying power of the lipstick on it's own is maybe an hour to an hour and a half, which is pretty good, but with a lip liner underneath it can last up to four hours. However, it does transfer off the lips if you are eating or drinking. I bought this lipstick for $3, since it was on sale. I think originally it's like $3 and some change, almost $4. If you've been wanting to try these out now is the perfect time to pick one up before you can't find them anymore.


Saturday, March 2, 2013

Jeffree Star/Spring Inspired Makeup


This look was inspired by Jeffree Star, it is also a perfect dramatic spring time look. :)

Products used on the eyes:
  • Urban Decay Primer Potion
  • Maybeline Color Tattoo in Too Cool
  • 8 Bit Cosmetics: Armature (Bronze)
  • Milani SIngle Powder Eyeshadow in Olympian Blue
  • BH Cosmetics 88 Matte Palette (Gold, Green and Highlight)
  • NYX Single Eyeshdaow in Mellow Yellow
  • Hot Topic Glitter Eyeliner Pencil in Black
  • Elf Liquid Eyeliner Pen in Black
  • Color Workshop Mascara
Products used for the face:
  • Hard Candy Sheer Envy Skin Perfecting Primer
  • Rimmel London Concelear 
  • Rimmel London Poreless Foundation
  • Cover Girl Translucent Powder
  • Color Workshop (Bronze Powder & Peach Blush)
Products Used for the lips:
  • Milani Color Perfect Lipstick in Tiki-Tiki-Pink
  • BH Cosmetics Lipgloss in 80's Diva

Brushes Used:
  • Color Workshop Eyeshadow Brush
  • Elf crease brush
  • Color Workshop Angeled Blending Brush
  • SOHO Blending Brush
  • Elf Stippling/Blending Brush
  • Elf Contour brush
  • Color workshop blush brush
Get The Look:
  • Apply your face primer before you start to apply your eye-shadow primer that way it would have sunken into your skin and your will be ready for you to apply your foundation. 
  • Apply an eyeshadow primer or if you don't have one apply a concealer and go over it with a bit of powder.
  • I applied a white base all over my lid.
  • Using an eyeshadow brush I applied a bronze eyeshadow onto my lid then went over it with a gold eyeshadow.
  • Using a crease brush apply a blue eyeshadow into and above your crease, then apply a yellow eyeshadow above the blue you should have enough space to apply the highlight color. Blend all the colors together for a seamless transition.
  • Now apply a highlight under the brows.
  • Now begin to line your eyes with a black eyeliner and then add some mascara. .
  • Using a stippling brush apply your foundation to your face.Blend it in and remember to put some on your neck.
  • Next apply a powder to set in your foundation. For this I used the stippling brush.
  • Taking a contour brush and elf bronzing powder begin to contour your face, place it at the hollows of your cheek, temples, both sides of your nose (optional) and along your jaw line. This of course if optional and it will make your face appear slimmer.
  • Now using your blush brush begin to apply a blush to the apple of your cheeks. 
  • I applied a pink lipstick and went over it with a hot pink to intensify the lip color.
Click here to watch the tutorial

Thursday, February 28, 2013

Sunset Inspired


Products used on the eyes:
  • Elf Eyelid Primer
  • NYX Jumbo Eye Pencil in Milk
  • L.A Color  Artist Eye Palette (Blue, Purple, Red, Orange, Yellow & Beige)
  • Wet n' Wild Eyeliner Pencil in Black
  • L.A Color Liquid Eyeliner Pen in Black
  • Color Workshop Mascara
Products used for the face:
  • Hard Candy Sheer Envy Skin Perfecting Primer
  • Rimmel London Poreless Foundation
  • Cover Girl Translucent Powder
  • Color Workshop (Bronze Powder & Peach Blush)
Products Used for the lips:
  • Milani Color Perfect Lipstick in Tiki-Tiki-Pink

Brushes Used:
  • Elf Eyeshadow Brush
  • Elf crease brush
  • Elf Stippling/Blending Brush
  • Elf Contour brush
  • Color workshop blush brush
Get The Look:
  • Apply your face primer before you start to apply your eye-shadow primer that way it would have sunken into your skin and your will be ready for you to apply your foundation. 
  • Apply an eyeshadow primer or if you don't have one apply a concealer and go over it with a bit of powder.
  • I applied a white base all over my lid.
  • Using an eyeshadow brush I applied a blue eyeshadow from the inner corner to 1/2 way on the lid and on the other half apply a purple eyeshadow. Don't forget to blend!!
  • Using a crease brush apply red above these colors, then above the red apply orange and last apply a yellow above the orange. Blend all the colors together for a seamless transition.
  • Now apply a highlight under the brows.
  • Now begin to line your eyes with a black eyeliner and then add some mascara. .
  • Using a stippling brush apply your foundation to your face.Blend it in and remember to put some on your neck.
  • Next apply a powder to set in your foundation. For this I used the stippling brush.
  • Taking a contour brush and elf bronzing powder begin to contour your face, place it at the hollows of your cheek, temples, both sides of your nose (optional) and along your jaw line. This of course if optional and it will make your face appear slimmer.
  • Now using your blush brush begin to apply a blush to the apple of your cheeks. 
  • I applied a bright almost barbie doll pink to my lips.
Tutorial