Tuesday, July 22, 2014

Get Ready With Me: Work Edition

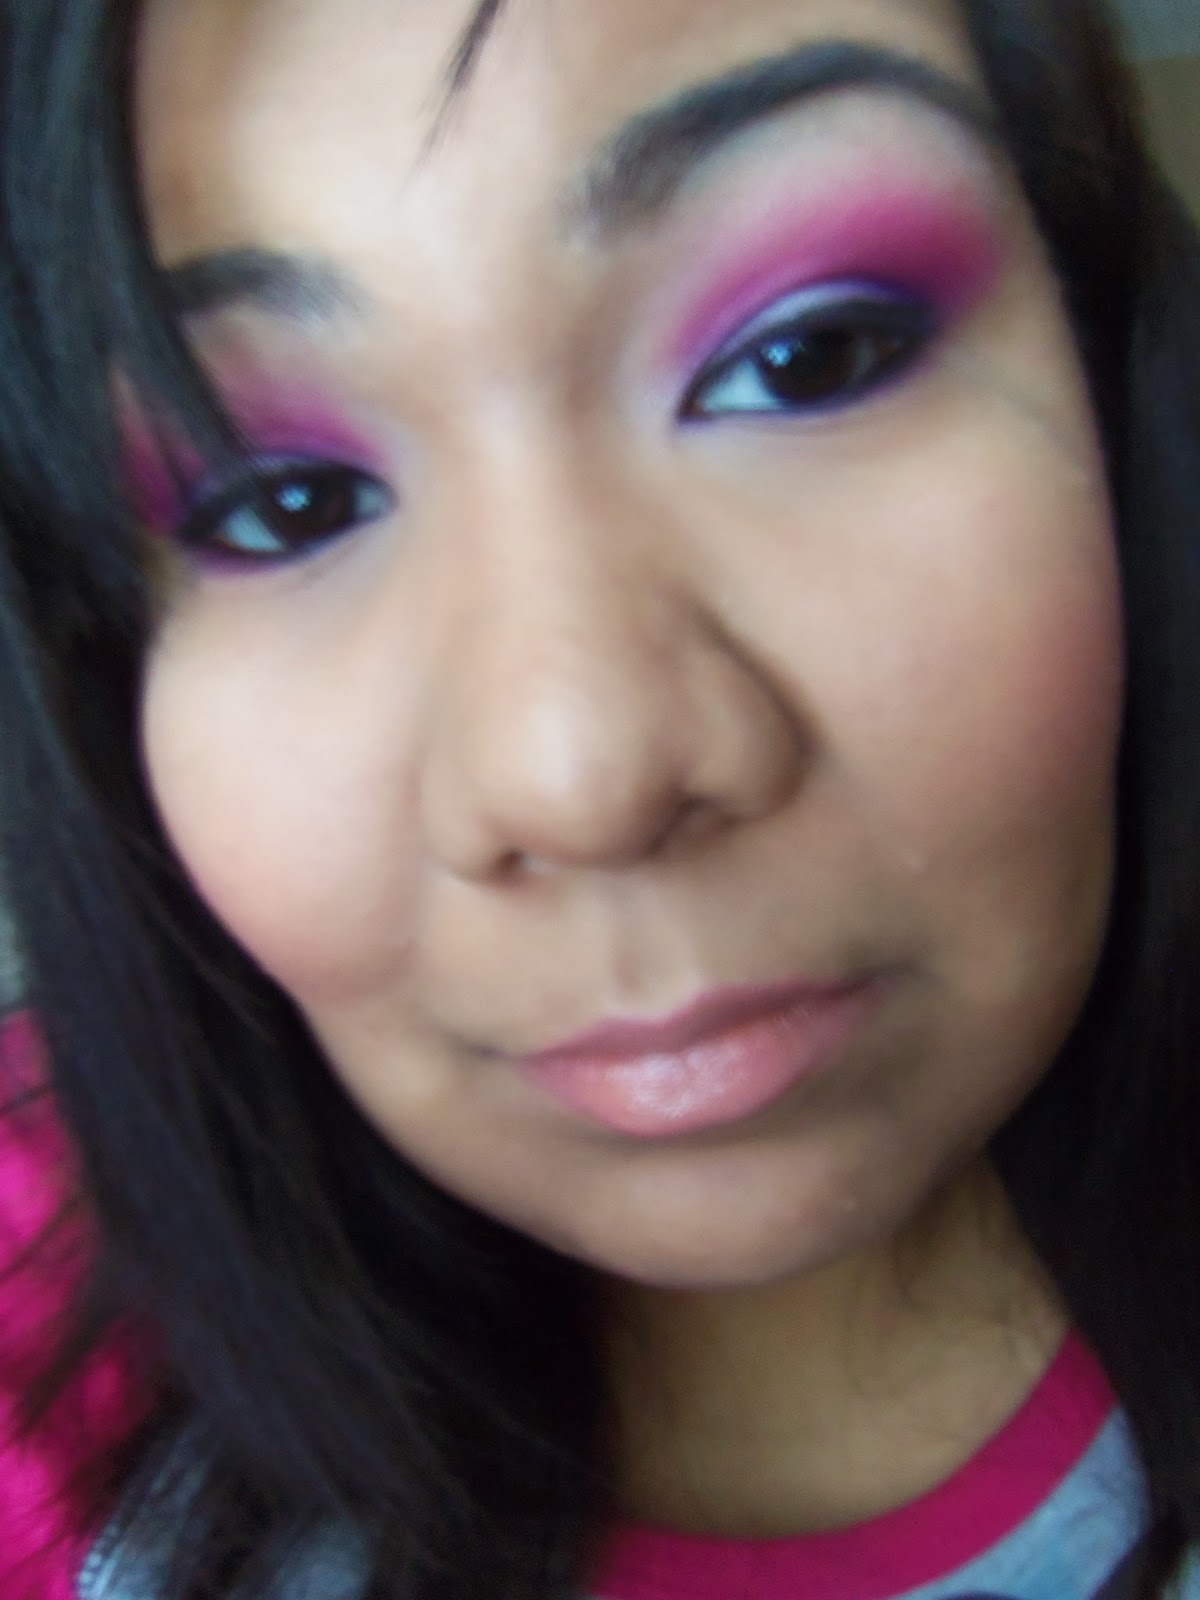
Hi everyone! Long time no see or read right? Ha Anyways, today I am going to show y'all how to achieve this super easy neutral look with a pop of color and I even include my outfit of the day!!! :) Hope y'all enjoy! :) 


Products used on the Eyes:
  • Wet n Wild Take on the Day eyeshadow Primer
  • Maybelline Color Tattoo in Too Cool
  • Physicians Formula Baked Collection in Baked Sands & Baked Smores
  • Milani Single Runway Shadow (Forgot name but it's a light shimmer blue)
  • Rimmel London Scandalous Eyeliner in White Witness
  • Wet n Wild Creme Eyeliner in Little Black Dress
  • Jordana 12 hr Made to last liquid Eyeliner Pencil in Black Point
  • CK One Mascara
Products Used on Face:
  • Too Faced Primed and Poreless
  • Revlon ColorStay Foundation in Toast Hale
  • Muidnight Velvet M.Vie Pressed Foundation Powder in Tawny
  • Wet n Wild Coverall Concelear in 802
  • BH Cosmetics 6 Color Contour and Blush Palette: Highlight, Contour and blush
  • Wet n Wild Reserve Your Cabana
Products Used on Lips:
  • Milani Transparent Lip Liner
  • Revlon Colorburst in Standout

Get The Look:
  • Apply an eyeshdow base to keep your eye makeup in place.
  • Then I applied a white base all over the lid.
  • I then used a shadow brush to apply a cream color all over the lid.
  • Then taking a small crease brush work a light brown into your crease. I then went back and worked a darker brown over the light brown.
  • I then took a fluffy blending brush and blended the colors together.
  • I then applied a bit of black shadow into the outer corner working into the crease just for some definition. 
  • I then applied a cream shade as a brow highlight. And using a wet brush I applied more of that cream color to the lid.
  • Now using a small crease brush I applied white eyeliner under my lower lashline and blended it out. 
  • Then went over it with a shimmering light blue shadow.
  • Now just line your eyes and add mascara.
  • So now you're just going to do your face makeup like you normally would.
  • For the lips I decided to rock some red lips since this look is still neutral and not super over the top.

Friday, June 6, 2014

Royal Elixir Face Serum Review

Hey my loves so first let me state how sorry I am for being m.i.a a lot of things have came up and right now I am without internet. So as you can imagine it is difficult to post stuff but since I am at my boyfriend's, I'm gonna take this opportunity to post a review!! I am going to be reviewing the Royal Elixir Face Serum by Perlier. I was given this wonderful opportunity by iFabbo and definitely jumped on this.

(Photo Credit: Perlier)

Let me just say one thing that I am a sucker for is packing and Perlier does it right!! Their packaging looks so elegant and just amazing it grabs your attention. When I got this product I didn't want to open the box, but when I did I wasn't disappointed with the product either it looked so pretty!


This Royal Elixir serum works like a lightweight moisturizer that doesn't leave you skin feeling tight, don't you just hate that feeling? You can use this instead of a moisturizer or use with. When I first was testing it out I used it underneath my moisturizer and it felt really refreshing. What I mean by that is my skin felt so soft!! When used on it's own it had my skin feeling the same way, but you definitely got a little bit of a "glow". This product does contain some shimmer but definitely not a lot to where you look like a vampire from Twilight.


This product absorbs quickly into your skin and it just feels so soft. It's not oily at all, which is perfect for anyone with oily skin, myself included. It does have a scent to it but it's very delightful it almost smells a little like honey.

So, overall I am loving this product and it does last a while all you need is one pump. This does cost $99, but let me tell you it's so worth it all you need is a little bit and you are good to go! You can check it out here if you are interested in it.

Tuesday, May 20, 2014

BH Cosmetics 6 Color Blush and Contour Palette Review

(Photo Credit: BH Cosmetics)

Hello my loves today I am going to be reviewing the 6 Color Blush and Contour Palette from BH Cosmetics. I know it's been like forever since I've done a review but I figured why not get back on track with this lovely palette. So a thing you should know is I bought this palette from one of my favorite little stores in Houston for $12 originally the palette is $18.95 and right now at this very second the palette is on sale for $14.95 for their birthday sale and it expires on the 23rd.


I bought this palette because I really want to be a makeup artist and I occasionally do people's makeup so I thought this palette would make an excellent edition to my collection. This palette contains 3 highlighters, 2 blushes and 1 contour shade. The highlighter colors ranges from a white to a yellow toned and pink toned powders. You practically have the shades you need for anybody and everybody which is definitely one of the things I love about it. The blush colors are pink and a medium tone pink blush, which are two universal shades that would flatter every skin color. Now I will admit the contour shade is a little intimidating since it's so dark but don't worry I did my research and by that I mean looked up reviews to see how it would be on fair skin tone. So after researching high and low, this contour shade is flattering on every skin tone.


So what are my thoughts on this palette you ask? I am in love with it. All the colors are matte which is perfect, seriously who doesn't love matte powders? Everything is easy to blend and they are very long lasting. The pan sizes are huge so this will definitely last you a while!
How my face look when using this palette.

Overall, this is an amazing palette and every makeup artist, whether professional or aspiring should have this in their kit. I use it all day everyday for my face routine everyday and it just looks so amazing and flawless. This is a definite must have!!! So know I must ask have you tried this product before? If so what are your thoughts let me know in the comments down below. Also I will demonstrate my contour and highlight routine in the up coming weeks. :)

Thursday, May 8, 2014

Aquamarine

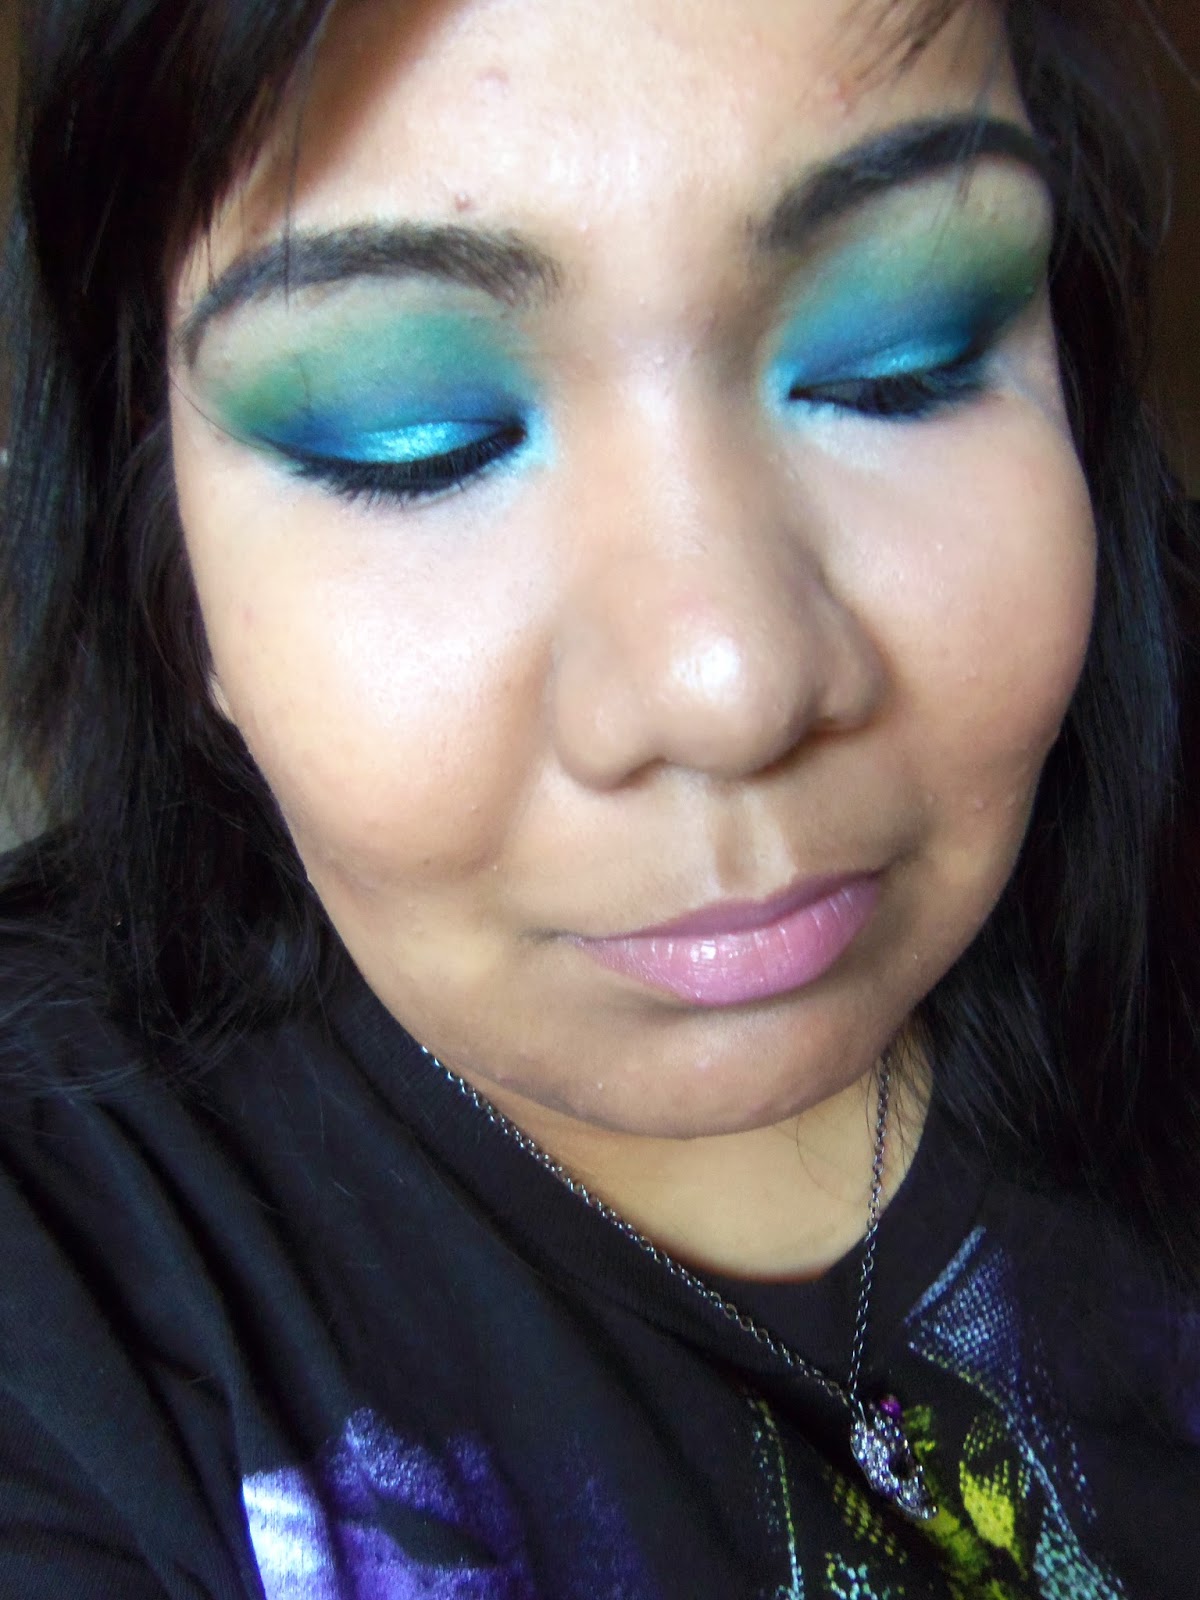
Hello my loves!!! I am finally back!!! I'm so sorry about being away for what seemed like forever! We had moved and I started working, so enough of this little boring update let's talk colors and spring! Omg, I have been obsessed with super dramatic looks ever since I did my birthday makeup like it's the best thing ever. I feel like it's kinda like Go big or go home, ya know what I mean? So today I bring you a pretty dramatic look using only blues and green. It definitely has a mermaid vibe going on. So without further to do keep reading to see how to do this look yourself as always I will include the video at the bottom of this post. :) 


Products used on the Eyes:
  • Elf eyelid primer
  • LA Colors Jumbo Eyepencil in Sea Shells
  • BH Cosmetics 88 Matte Palette: Blue, White and flesh tone
  • BH Cosmetics 120 1st Edition: 2 different shades of blue, shimmer baby blue and shimmer mint, and shimmer green
  • Mary-Kay Single Shadow in Moonstone
  • LA Eyeliner Pencil in Electric Blue
  • Wet n Wild Coloricon Eyeliner Pencil in White
  • Essence Eyeliner Pencil in Scream Green
  • Jordana 12 hr Made to last liquid Eyeliner Pencil
  • Jordana Liquid Eyeliner 
  • Beauty Trends Water Proof Mascara
Products Used on Face:
  • Revlon ColorStay Foundation in Toast Hale
  • Muidnight Velvet M.Vie Pressed Foundation Powder in Tawny
  • Wet n Wild Coverall Concelear in 802
  • BH Cosmetics 6 Color Contour and Blush Palette: Highlight and Contour
  • Sephora Big Mini Palette: Peach Blush
Products Used on Lips:
  • Maybelline Baby Lips in Pink Punch
Brushes Used:
  • BH Cosmetics 40 Piece Brush Set: Flat Shadow, Small Flat shadow, Fluffy blending, Angled Blush  and foundation brush
  • Elf Powder Brush
  • Elf Crease Brush
  • BH Cosmetics Double Ended Travel Brush Set: Concealer Brush
  • Crown Deluxe Contour
  • Crown Pro Blending Brush
Get The Look:
  • Apply an eyeshdow base to keep your eye makeup in place.
  • Then I applied a white base all over the lid.
  • I then used a shadow brush to apply a 2 different shades of blue that are similar mixed in the inner corner and outer corner. Be sure to leave the middle free of color.
  • Then taking a small crease brush work those blues into the crease connecting the outer and inner corner.
  • I then used a small flat shadow brush and mixed a shimmer baby blue and shimmer mint color and applied that in the middle blending into the blues.
  • I then took a fluffy blending brush and blended some green into the blue above the crease.
  • Then taking a clean blending brush blend all the colors together.
  • I then applied a skin tone shade as a brow highlight.
  • Now using a blue eyeliner apply that under your lower lash line and apply some blue shadow over it.
  • For fun I added a green liner in the outer corner connecting both the color on my lid and lower lashline, think of sort-of like a double wing.
  • In that opening of the inner corner I applied a white base and went over it with a white eyeshadow.
  • Now just line your eyes and add mascara.
  • So now you're just going to do your face makeup like you normally would.
  • For the lips I decided to use a light pink lip balm.

Thursday, April 3, 2014

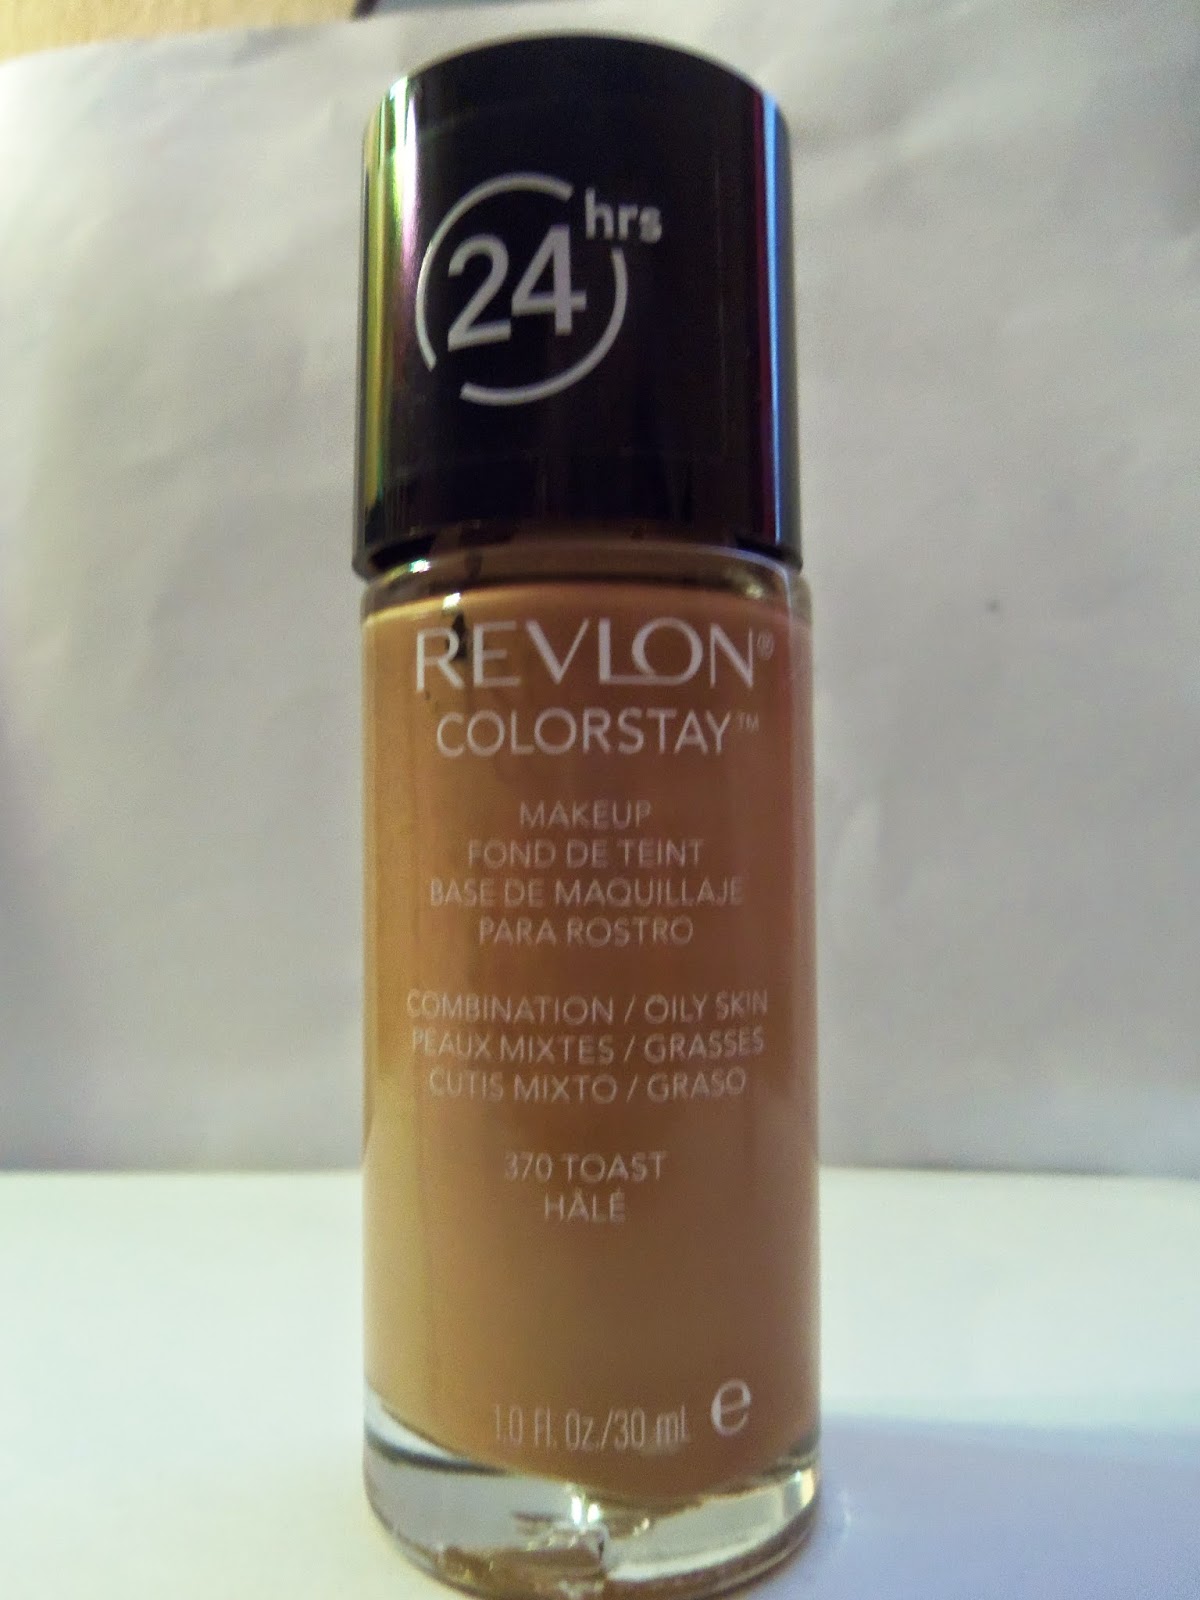
Revlon Colorstay Foundation Review

Hello my lovely angels, today I'm going to be reviewing the Revlon ColorStay Foundation. I've featured this product in three videos already but I wanted to do a more in depth review on it.

Let's go back to November, I finially decided to try a new foundation since my current one (at that time) wasn't doing my face any justice except make me look pale and no one wants that. So, I started to look up reviews since shopping for a new foundation, at least for me, is stressful since there are so many to choose from. After watching reviews, reading blog post and asking fellow beauty bloggers, the top 2 foundations that were the most talked/raved about were the Neutragena Healthy Skin and The Revlon ColorStay. I wasn't exactly sure which one I wanted so I went to HEB with my brother and decided to go check them out. When I did the Healthy Skin was around $12 and the Revlon ColorStay was $9.45 and there was a $2 off coupon for any Revlon product. I took that as a sign and bought the Revlon ColorStay Foundation for Oily/Combination skin in 370 Toast Hale.


This color does look a little darker than my actual skin tone but once applied I think it matches my skin perfectly.

The product comes in a glass bottle with a black top. You get 10 fl oz/ 30 mL of product. I love how the bottle looks simple but I hate that there's no pump to get the product out. Also, when I bought the foundation there was only tape to prevent people from opening it. I really wished there was plastic around the whole bottle to ensure that wouldn't be tampered with. Now moving on to the claims. So, according to Revlon this foundation has "Long wearing coverage with a lightweight formula that won't cake, fade, or rub off. With time release technology specifically formulated for combination or oily skin to control oil absorption and shine. Your look stays flawless throughout the day. Makeup feels comfortable and wears up to 24 hours."

I personally love this formula! The foundation has a medium to full coverage and is easily build-able, which I love! Trust me my skin needs so much coverage. It definitely does cover any imperfections and fine lines and it looks so natural! It does give you a sort of matte look. I apply it with my Elf Professional Powder brush and it gives me a nice streak-free airbrushed look. I can definitely agree with the claims, it does not give you a cakey face or feel heavy, sometimes I even forget I'm wearing it. It doesn't rub off or transfer once you set it your good to go for the rest of the day.

Now the things I don't like. It does have an unpleasant scent which does smell awful. However, you don't notice it once you've applied it to your face. I do feel my face get a bit oily towards the end of the day but not a lot. There's no pump and that's about all I don't like.

Overall, I am in love with this foundation! I definitely will be repurchasing this foundation.

*Note* I am aware they changed the formula, I haven't tried it yet but once I'm out of my current foundation I will test it out and let y'all know how I feel about it.


Monday, March 31, 2014

Update/ Tmi tag

Hey everyone I know I've been kinda m.i.a. on my blog but I am back. :) I've been focusing a lot on my youtube channel and I've been meaning to blog but I kinda haven't had the chance since my boyfriend was visiting me for my birthday week. Now that he is gone I will have time to focus on my blog and channel, it's kinda a bittersweet thing if you ask me.

Anyway, I have been planning future blog post as well as slowly testing out products to review for y'all, trust me there is a lot of reviews coming. So this time away from blogging has been a bit productive if I do say so myself. I have uploaded a makeup and brush collection on my channel if you would like to see. I will put the videos below and today I am uploading the tmi tag so you can check that out as well. I will put the questions and video in this post so y'all can check that out as well.


Oh and I started working out again! Which to me is exciting and not so exciting. I'm trying to lose as least 20 pounds before my brother's wedding which is on May 24th. So I still have a little over two months so far I've lost 6.7 pounds in 3 weeks.

Yeah so that is it for this little update I guess you can say now on to the tmi tag!


TMI TAG ∙ QUESTIONS:
1: What are you wearing?
2: Ever been in love?
3: Ever had a terrible breakup?
4: How tall are you?
5: How much do you weigh?
6: Any tattoos?
7: Any piercings?
8: OTP?
9: Favorite show?
10: Favorite bands?
11: Something you miss? .
12: Favorite song?
13: How old are you?
14: Zodiac sign?
15: Quality you look for in a partner?
16: Favorite Quote?
17: Favorite actor?
18: Favorite color?
19: Loud music or soft?
20: Where do you go when you’re sad?
21: How long does it take you to shower?
22: How long does it take you to get ready in the morning?
23: Ever been in a physical fight?
24: Turn on?
25: Turn off?
26: The reason I joined Youtube?
27: Fears?
28: Last thing that made you cry?
29: Last time you said you loved someone?
30: Meaning behind your YouTube Name?
31: Last book you read?
32: The book you’re currently reading?
33: Last show you watched?
34: Last person you talked to?
35: The relationship between you and the person you last texted?
36: Favorite food?
37: Place you want to visit?
38: Last place you were?
39: Do you have a crush?
40: Last time you kissed someone?
41: Last time you were insulted?
42: Favorite flavor of sweet?
43: What instruments do you play??
44: Favorite piece of jewelery?
45: Last sport you played?
46: Last song you sang?
47: Favorite chat up line?
48: Have you ever used it?
49: Last time you hung out with anyone?
50: Who should answer these questions next?

Friday, March 21, 2014

Get ready with me: Birthday Edition

Hey everyone! Today I'm going to be showing you how I did my makeup for my birthday yesterday. I decided to be super bold and colorful as you can see from the pictures. I was inspired by Queen of Blending, she had posted a picture of a look similar to this of course I put my own spin on it. I had film a video for this but it's more of a get ready with me video as always I will include the video at the end of this post. :) 


Products used on the Eyes:
  • Wet n Wild Take on the day eyeshadow primer
  • Maybelline Color tattoo in gold rush
  • BH Cosmetics: Dark Purple, Purple, Pinkish purple, flesh tone, and mint
  • BH Cosmetics 120 1st Edition: dark purple, hot pink, blue and light blue
  • 8 Bit Cosmetics Armature
  • Jordana 12 hr Made to last liquid Eyeliner Pencil
  • La Colors Graffix Liquid Eyeliner 
  • Wet n Wild Megalenght Mascara
Products Used on Face:
  • Revlon ColorStay Foundation in Toast Hale
  • Muidnight Velvet M.Vie Pressed Foundation Powder in Tawny
  • Wet n Wild Coverall Concelear in 802
  • BH Cosmetics 6 Color Contour and Blush palette
Products Used on Lips:
  • Wet n Wild Just Peachy Lipstick
  • BH Cosmetics Lipgloss in Studious
Brushes Used:
  • BH Cosmetics 40 Piece Brush Set: Shadow, Angled Shadow, Fluffy blending and foundation brush
  • Elf Powder Brush
  • Elf Crease Brush
  • BH Cosmetics Double Ended Travel Brush Set: Blending Brush
  • Crown Tapered Blush Brush
  • Crown Deluxe Contour
  • Crown Chisel Shadow Brush
Get The Look:
  • Apply an eyeshdow base to keep your eye makeup in place.
  • Then I applied a gold base all over the lid.
  • I then used a shadow brush to apply a bronze/gold shadow over the base we just applied.
  • I used a fluffy blending brush and applied a dark purple in the crease.
  • Using the same brush I applied a pinkish/purple over the dark purple blending it into it.
  • Then using a different fluffy shadow brush blend out the crease color with a hot pink shadow.
  • I then applied a skin tone shade as a brow highlight.
  • I then used a white base and applied it under my lower lash line this is of course optional but I wanted the colors to pop.
  • Going over the white base I applied a blue and as I got closer to the inner corner I then starting dragging the color at an angle. I then went over the blue with a purple.
  • In that opening of the inner corner I applied a mint blue color.
  • Now just line your eyes and add mascara.
  • So now you're just going to do your face makeup like you normally would.
  • For the lips I decided to use a peach lipstick and went over it with a light pink lipgloss.

Thursday, March 13, 2014

Disney's Frozen: Elsa Inspired Makeup

Hello everyone so I have a question, do you wanna build a snowman??? Hehe but seriously! So today;s look is inspired by Elsa from Disney's Frozen. I am obsessed with the movie but more with Elsa's makeup so I just had to re-create it. So as always I will include the actual video tutorial towards the end of this post. So if you would like to know how to get this look and see what I used just keep reading!!!


Products used on the Eyes:

  • Urban Decay Potion Primer
  • La Colors Jumbo Eye Pencil in Seashells
  • Sephora Big Mini Palette: Purple and Pale Pink
  • BH Cosmetics 120 1st Edition: light purple, dark purple/plum, reddish brown & hot pink
  • BH Cosmetics 120 4th Edition: light purple, light pink and taupe
  • The Color Workshop: Pink & Bare
  • Hot Topic Glitter Eyeliner Pencil
  • Jordana Fabu Eyeliner Pen
  • Too Faced Lashgasm Mascara
Products Used on Face:
  • Revlon ColorStay Foundation in Toast Hale
  • Elf Pressed Powder in Honey
  • Wet n Wild Coverall Concelear in 802
  • Maybelline Loose Powder in light
  • Klean Color Make Me Blush Palette: Pink blush and Contour
Products Used on Lips:
  • Wet n Wild Bare It All Lipstick
  • NYC Lipgloss in Nude New York
Brushes Used:
  • BH Cosmetics 40 Piece Brush Set: Shadow & Angled Blush brush
  • Loreal HIP Shadow Brush
  • BH Cosmetics Double Ended Travel Brush Set: Smudger, Blending and lip brush
  • Apply an eyeshdow base to keep your eye makeup in place.
  • Then I applied a white base all over the lid.
  • I then used a small shadow brush to apply a deep purple in the inner and outer corners. Be sure to keep the middle area clean.
  • I then went over the deep purple with a lighter purple shadow.
  • In the middle I applied a light shimmer purple and then went over it with a light almost pale pink shimmer shadow.
  • Then using an angled shadow brush and a mixture of a plum and reddish brown shadow you are going to apply this in the crease also under the lower lash line. Don't forget to blend.
  • Then using a fluffy shadow brush blend out the crease color with a hot pink shadow.
  • Then blend out the hot pink using a lighter pink and use a skin tone shade as a brow highlight.
  • Using a pale pink blend out the color under the lashes and apply near the inner corner.
  • Using a shimmery taupe color as the inner corner highlight.
  • Now just line your eyes and add mascara.
  • So now you're just going to do your face makeup like you normally would.
  • For a little bit on an extra "glow" I add some of the shimmery taupe color on my cheek bone as a highlight.
  • For the lips I had played around with different colors but I really like a nude lip with the look a lot better.

Tuesday, March 4, 2014

Date Makeup l Full Face

Hey everyone! This look that I'm showing you today was originally suppose to be for valentine's day but since I couldn't edit my video I decided just to put it off, but you can still rock this look on a date or girl's night out! It's really simple and looks amazing on girl's with brown eyes. Also, I will include a video at the end so you can see how I did everything!!! :)


Products Used on the Eyes:

  • Elf Eyelid Primer in Sheer
  • Maybelline Color Tattoo in Gold Rush
  • BH Cosmetics 120 Palette 4th edition Gold
  • BH Cosmetics 88 Matte Palette Black Purple white and off white
  • 8 Bit Cosmetics Armature
  • Younique Loose Shadow pigment in Regal
  • NYX Jumbo Eye Pencil in Milk
  • Jordana Eyeliner Pencil in Black
  • Jordana FabU Eyeliner Pen in Black
  • Too Faced LashGasm Mascara


Products Used on Face:

  • Revlon Colorstay Foundation in 
  • Kat Von D Tattoo Concealer
  • Elf Pressed Powder in Honey
  • Maybelline Loose Powder in Light
  • Klean Color Make Me Blush Palette: Bronzer & Highlighter
  • M.Vie Pressed Blush in Maple Leaf


Lips:

  • Revlon Colorburst Matte Balm in Stand 


Brushes Used:

  • BH Cosmetics Eyeshadow Brush
  • Crown Chisel Shadow Brush
  • BH Cosmetics Fluffy Blending Brush
  • BH Cosmetics Double-Ended Travel Blending Brush
  • Elf Crease Brush
  • BH Cosmetics Double-Ended Travel Lip Brush
  • Elf Studio Powder Brush
  • Elf Studio Small Stippling Brush
  • Nikki's Magic Wand
  • Crown Deluxe Contour Brush
  • Crown Blush Tapered Blush Brush

Hair:

  • Teasing Comb
  • Tresamme 24hr Body Hair Spray

Get the look:

  • Apply an eyeshdow base to keep your eye makeup in place.
  • Then I applied a gold cream base all over the lid.
  • I then applied a shimmer gold eyeshadow over the base using a medium size paddle brush and go over it with a matte bronze/gold shadow.
  • Then using a fluffy eyeshadow brush apply a matte black eyeshadow in the outer corner blending into the crease.
  • Using a small fluffy blending brush blend a medium shade of purple into the black. Then just blend everything together using a clean blending brush.
  • Using a small crease brush apply a dark purple under the lower lash line.
  • Using a small lip brush apply a white cream base in the inner corner and go over it with a white shadow.
  • Apply a mixture of a white and off white color under on your brow bone.
  • Now just line your eyes and add a coat of mascara.
  • Then just apply your face makeup how you normally would do so.
  • I decided to add some volume to my hair just to tie the look together.


Thursday, February 27, 2014

Majestical Jewelry Review

Disclosure: I got this product as part of an advertorial. 

Hello my lovely angels, today I'm not going to be talking about makeup or anything beauty related, shocker, I know. Instead I will be talking about jewelry. My taste in jewelry is probably the same as my choice in makeup. I love bold, colorful, classy, edgy, sparkly and over the top! No surprise there but I love a necklace that can just make a statemment I guess that's why some are called "statement necklaces".


Recently, I was sent a beautiful necklace and earring set from Majestical. Like many of you reading this, I haven't heard of them before until a few weeks ago. I was curious as to what kind of jewelry they had to sold so I went to checkout their site and oh my gosh I feel head over heels in love with what I saw. They have so many jewelry sets/pieces to choose from and have something for everyone's taste! Honestly, I've been putting together a wishlist on my pinterest. Seriously, they are a hidden jem on the internet.


Anyways, the necklace and earrings I got are a set. The necklace is a floral necklace statement piece. The chain is gold with a black floral design. It is approximately 24" in length plus has a 3" extender with a lobster claw clasp. The earrings are black drop earrings. They aren't really my style but they do look amazing with the necklace. You can buy this set for $28.00


Definitely check out their website they have so many things to choose from and the prices are very affordable for amazing pieces of jewelry. At the moment if you buy $55 worth of jewelry you can get $15 off with a coupon code: 15DOLALRSOFF. They do ship the same day and their shipping is extremely fast, who doesn't love fast shipping? I really do hope you guys check them out and be sure to check out their instagram they post pictures of what's not on the website as well. They are super friendly and be sure to show me what you guys buy, if you decide to purchase something.

xoxo,
Tori


I received one or more of the products mentioned above for free using Tomoson.com. Regardless, I only recommend products or services I use personally and believe will be good for my readers.